Curious how to program new garage door remote?
We built Emerald Garage Door Services on clear, honest work. We are licensed, insured, and bonded. Our family-owned team serves Central Florida with 24/7/365 repair, installation, and maintenance.
In this short guide, we outline simple steps for pairing a transmitter with your garage door opener. You will see the correct learn button sequence, brief timing windows, and what to check before you climb a ladder. Follow safe practices and protect your security while you work.
We list common opener and button sequences for major models and offer quick troubleshooting if the unit does not respond. If anything feels risky or unclear, call us at (407) 788-1229 or email EmeraldGarageDoorServices@gmail.com. We back every job and every part.
Key Takeaways
- Simple, safe steps let you pair a transmitter with confidence.
- Check batteries, the opener light cover, and ladder safety first.
- Learn button timing varies by model—follow the correct sequence.
- Quick fixes cover the most common pairing issues.
- Call our 24/7 team if programming fails or security is a concern.
Before you start: safety, tools, and what to expect
Before you touch any hardware, take a minute to prepare the work area and gather essentials. We recommend a stable ladder, eye protection, and fresh batteries for the transmitter. Safety matters — we are licensed, insured, and bonded, and available 24/7/365 if you prefer a technician; call (407) 788-1229 or email EmeraldGarageDoorServices@gmail.com.

Safety checklist and make sure pre‑programming steps
Clear the area under the door of people, pets, and vehicles. Keep hands away from moving parts and stay within range of the antenna during pairing.
- Use a sturdy ladder and remove the light cover carefully to avoid damaging the LED board.
- Find the model label under the cover and note the learn button color — it changes the exact instructions and timing.
- Confirm the remote battery is fresh and that its indicator light works when pressed.
- Ensure the hanging antenna wire is straight and not tucked away; poor range can add several seconds to attempts.
- If a wall panel exists, navigate Menu → Features → Program → Remote to enter programming mode without reaching the motor head.
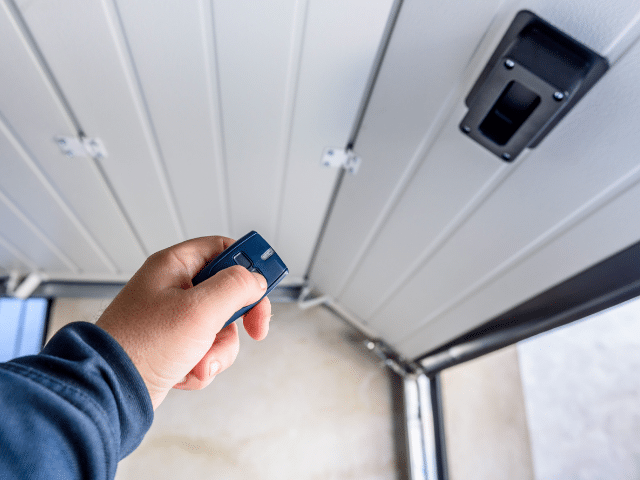
What to expect at the opener
Locate the learn button near the antenna on the motor housing; it may sit behind the light cover. Holding that button around six seconds clears stored codes and improves security. Typical confirmations include an LED blink, lights flashing, or an audible click when programming completes.
how to program new garage door remote
A few focused steps at the opener will get a button linked safely and quickly. We walk you through locating the learn button and entering programming mode with simple, repeatable actions.
Find the learn button near the antenna on the motor head. Remove the light cover if needed. Press and release the learn button to put the unit into programming mode; an LED or light often blinks as confirmation.
- Within the window of seconds, press and hold the desired button on the transmitter until the unit flashes or clicks, then release the button.
- Some models need an extra press-and-hold inside the same window. Follow the exact instructions for your opener remote and watch the led or light for confirmation.
- Stand close and point the remote at the receiver. Test the door opener several times and check safety reversal before regular use.
If pairing fails, check the battery, verify the learn button color and retry. We’re on call 24/7/365 with background-checked technicians. Call (407) 788-1229 or email EmeraldGarageDoorServices@gmail.com and we will finish the setup and guarantee the result.
Brand-specific steps for popular garage door openers and remotes
Each brand has its own timing and button counts for reliable pairing. Follow the exact steps for your model and watch for the LED flash or a click that confirms success.

LiftMaster/Chamberlain/Craftsman 891LM & 893LM: Press the opener’s learn button once. Then press and hold the chosen button on the transmitter until you see two clicks or a light flash. Release and test the door operation.
LiftMaster 890MAX & 893MAX: Hold the remote’s program button until the LED lights. Use the learn-button color mapping: Yellow = 1 press, Purple = 2, Red/Orange = 3, Green = 4. Exit programming mode, press the opener Learn, then press the programmed button until the unit confirms.
LiftMaster 375UT universal: Slide off the battery cover and hold Program until the LED lights. Press the opener Learn, then tap the chosen button the color-specific number of times: Yellow 8, Purple 3, Red/Orange 2, Green 4. Press Program to exit and run a test cycle.
Using the wall control panel
If your opener supports a wall panel, navigate Menu → Features → Program → Remote. This lets you add a transmitter without removing the light cover or climbing a ladder.
- Keep a steady rhythm when instructions call for a press release and watch the LED for changes.
- Match the transmitter casing and learn-button color if you are unsure which model you own.
- We regularly map multiple remotes and panels and back every job with a full guarantee on parts and labor.
Reprogramming, clearing memory, and programming multiple doors
A quick memory clear at the opener removes old access and sets a clean slate for trusted devices.

Erase old remotes and reset codes using the Learn button hold
To reset access, press and hold the learn button on the garage door opener for about six seconds. Release when the indicator goes dark. This erases every stored code so unknown remotes no longer control the opener.
After clearing, repeat the standard pairing steps to add only devices you trust. Watch the LED or light for confirmation at each press release. If pairing fails, wait a few seconds and try again while staying within range of the antenna.
Program garage door buttons for two or more doors on one remote
For multi-door setups, assign one button per opener. Press Learn at the first opener, pair the chosen button, test, then move to the next opener and repeat the sequence.
- Label each button remote clearly so household members know which door each control operates.
- Confirm safety sensors are aligned and that the door reverses properly after each test.
- Keep a record of the model and button mapping for future reference.
If you moved into a new home or lost a transmitter, we recommend clearing memory and reprogramming for security. We can perform a full security refresh, clear old remotes, program garage units, and test safety features 24/7 with guaranteed parts and labor. Call (407) 788-1229 or email EmeraldGarageDoorServices@gmail.com.
Troubleshooting, smart control, and when to call Emerald Garage Door Services
Many interruptions trace back to batteries, alignment, or range — and are fast fixes. We walk you through checks that often restore normal operation in minutes.
Quick fixes: batteries, range, antenna, sensor alignment, and programming mode
First, replace the battery in the transmitter and test within a few feet of the opener. Confirm the antenna hangs straight and the safety sensors face each other with no obstructions.
If the unit will not respond, enter programming mode at the motor and give a few seconds between presses so the system captures the code. Check the light or movement for confirmation.
Universal remotes and in‑car systems
For universal devices, follow the maker’s guide, press the opener Learn, then press the chosen button until the opener confirms. For in‑car buttons or app control, start pairing in the vehicle or the app and finish by pressing Learn at the motor head.
When to call Emerald Garage Door Services
We offer 24/7/365 support across Central Florida. If the unit still fails, sensors flicker, or security is a concern, call (407) 788-1229 or email EmeraldGarageDoorServices@gmail.com. Our background‑checked team tests every safety feature and guarantees parts and labor.
- Replace battery, test near the antenna, then reprogram if needed.
- Confirm sensor alignment, panel status, and unobstructed beam.
- Call our experts for fast diagnostics or same‑day service at home.
Conclusion
In short, a few clear checks and quick actions can keep your system reliable and safe.
You now have a step‑by‑step path for pairing, confirming success, and keeping things running with simple, safe checks. If anything looks unusual, we will program devices, reset codes, align sensors, and verify full operation the same day.
We are family‑owned, licensed, insured, and bonded. Our background‑checked technicians arrive ready and work to local codes. We back every visit with an unmatched guarantee on parts and labor.
Call Emerald Garage Door Services any time at (407) 788-1229 or email EmeraldGarageDoorServices@gmail.com. We are available 24/7/365 and ready to make sure your system works exactly as it should.
FAQ
What should we check for safety before beginning programming?
Turn off power to the opener if possible, keep people and pets clear of the door, and disconnect any automatic locking devices. Make sure the door is visible and the photo-eye sensors are aligned. Have fresh batteries for the remote and a ladder or step stool ready. These steps protect people and the equipment during setup.
How do we identify the opener brand, model, and the Learn button color?
Look at the label on the motor housing for brand and model information. The Learn button is usually near the antenna wire and may be under a light cover. Note its color — common colors include red, purple, yellow, orange, or green. That color helps determine the correct sequence for programming.
Where is the Learn button and how do we enter programming mode?
The Learn button sits on the back or front panel of the opener motor. Pressing it briefly puts the unit into programming mode; the opener light often blinks or the LED on the panel will illuminate. After the Learn button is pressed, you have a short window of seconds to complete the next step with the remote.
What is the press, hold, and release sequence for pairing a handheld remote?
After pressing the opener’s Learn button, press and hold the remote button you want to program. Keep holding until the opener light flashes or you hear a click. Release the button once you see the confirmation. Test the remote by pressing the programmed button to open or close the door.
How do we confirm programming worked?
A visible LED flash or the opener light blink is the usual confirmation. Then test the remote from a short distance. If the door responds, programming succeeded. If not, repeat the sequence and ensure you pressed the opener’s Learn button within the required seconds before the remote button.
What are the steps for LiftMaster, Chamberlain, and Craftsman models like 891LM and 893LM?
Locate the Learn button on the opener, press it, then within the allowed seconds press and hold the remote button until the opener light flashes. These models follow the typical Learn-button pairing and often respond with a single blink to indicate success.
How do 890MAX and 893MAX remotes differ in programming?
These models use the opener’s Learn-button color mapping. Identify the Learn button color and follow the manufacturer sequence for that color. Often the remote requires a different number of presses or a longer hold, so follow the color-specific instructions on the remote manual or the opener label.
What about the LiftMaster 375UT universal remote programming?
The 375UT uses different sequences depending on the opener’s Learn-button color. Enter the opener’s programming mode, then use the 375UT’s sequence for that color. Watch for LED flashes on the opener or the remote to confirm a successful link.
Can we program remotes using the wall control panel menu?
Some modern wall consoles include menus for remote programming. Enter the console menu, choose remote setup, and follow on-screen prompts. This avoids accessing the motor housing and can be easier on newer systems that support built-in programming.
How do we erase old remotes and reset codes?
Press and hold the opener’s Learn button for about 6–10 seconds until the LED goes out or the light blinks in a specific pattern. This clears all stored remote codes. After clearing, reprogram each remote and keypad as needed.
How can we program one remote to control two or more doors?
Program each door’s opener to a separate button on the remote. Enter programming mode at the first opener, press and hold the remote button assigned to that door, then repeat at the second opener using a different remote button. Test each button with its corresponding door.
What quick fixes help when programming fails — batteries, range, antenna, sensors?
Replace remote batteries, move closer to the opener, and ensure the opener’s antenna hangs down unobstructed. Check photo-eye sensor alignment and clear debris. If the opener is in an unexpected state, power-cycle it and retry the programming sequence.
How do we program a universal remote or link car HomeLink and MyQ-style apps?
For universal remotes, follow the remote’s step-by-step code or Learn-button method for your opener’s Learn-button color. For vehicle HomeLink, use the car’s learn menu and then press the opener’s Learn button within the vehicle’s programming window. For MyQ or similar smart apps, follow app instructions to connect to your Wi‑Fi network and then add the opener using the app’s pairing procedure.
When should we call Emerald Garage Door Services for help?
Call us when programming steps fail after basic troubleshooting, when the opener does not enter Learn mode, or when you suspect a hardware fault. We offer expert support in Orlando and Central Florida. Reach our team at (407) 788-1229 or email Emerald Garage Door Services@gmail.com for 24/7 assistance.