Thinking how to fix a garage door spring? We ask this because many homeowners underestimate how much tension and timing play into a safe, working system.
We are Emerald Garage Door Services, a family-owned, licensed, insured, and bonded team serving Orlando and Central Florida. We repair, install, and maintain garage door systems with modern technology. Our background-checked technicians are on call 24/7/365.
This project is advanced and may take a full day. Typical material costs run $101–$250. Torsion units mount above the opening. Smaller panels may use a single coil. Measure spring length, diameter, and the door’s width and height before you begin.
We explain when a careful DIY attempt makes sense and when you should call us for fast, guaranteed repair. We also cover safety habits, parts choices like double‑life torsion and 7×19 lift cables, and clear measuring tips so you pick the right components.
Key Takeaways
- This is an advanced DIY task that can take significant time; plan accordingly.
- Measure spring length and diameter and the door width and height before buying parts.
- Double‑life torsion springs and 7×19 cables add about $65 but extend service life.
- Our licensed team is available 24/7 for safe, guaranteed repair across Central Florida.
- Call (407) 788-1229 or email EmeraldGarageDoorServices@gmail.com for immediate help.
Read This First: Safety, Scope, and When to DIY vs. Call a Pro
Before you touch any hardware, read this short safety checklist and assess the job’s scope. Torsion tension can release suddenly and cause serious injury. We urge caution and clear planning.
Unplug the opener and pull the emergency release. Secure the panel with a C‑clamp or locking pliers on the track above the bottom roller. Make sure lighting is strong and an exit remains clear.
- Only use solid steel winding bars. Never improvise with screwdrivers or cheater bars.
- Stand to the side of the winding bar when you work. That reduces injury risk if tension slips.
- Wear gloves and safety glasses. Keep kids, pets, and vehicles out until testing is done.
- Stop and call us if you see frayed cables, damaged cones, a twisted tube, or loose set screws.
We set realistic expectations about the tools, time, and experience needed. When in doubt, our background-checked technicians are available 24/7/365. Call (407) 788-1229 or email EmeraldGarageDoorServices@gmail.com for same‑day, licensed, insured, bonded service.
Identifying Your Spring System: Torsion vs. Extension vs. TorqueMaster
Start by checking the hardware above the header to see which spring setup is installed.

Torsion systems mount on a bar above the garage door opening. Springs apply torque to a torsion tube that spans side to side. Cable drums sit at each tube end and lift the door via cables attached at the bottom brackets.
Look for the center bracket and the set cones on the tube. Measure spring length and inside diameter before ordering replacements. Smaller panels often use a single torsion spring; larger doors use two.
Extension vs. torsion
Extension springs run parallel to the track and stretch as the door opens. They are easier to spot but less stable than torsion systems. This guide emphasizes torsion because of its serviceability and balance advantages.
TorqueMaster notes
Wayne Dalton TorqueMaster springs hide inside a counter tube and use a wheel that counts turns. They need different tools and a different procedure. If you’re unsure which system is in place, we service all major types in Central Florida and can confirm during a quick call or visit.
- Signs of mismatch: uneven travel, poor balance, or strain at one side.
- Cables that fray or kink must be replaced; use 7×19 lift cables for longevity.
- We recommend double‑life torsion springs for longer service intervals.
Call (407) 788-1229 or email EmeraldGarageDoorServices@gmail.com for identification and options. We’ll ensure a safe, correct repair path.
Tools, Materials, and Time Budget
Prepare your workspace and tools so each step is controlled and predictable. We list only the gear you need and why it matters. That keeps work safe and efficient.
Essential tools include solid steel winding bars (18–24″), locking pliers or C‑clamps, adjustable and socket wrenches, a cordless drill for set screws, leather gloves, safety glasses, and rags. Use winding bars for safe winding and keep the bar set dedicated to this task.
Materials we recommend: double‑life torsion springs and 7×19 lift cables. These parts reduce downtime and extend service life. Replace bottom brackets if damaged and measure spring length and diameter before ordering replacements.
- Time: First‑time DIYers often need a full day. Experienced techs finish faster.
- Cost: Typical material costs run $101–$250 for most replacement jobs.
- Staging: Keep parts and tools near the opening to avoid distractions and trips.
- Warranty: We stock quality parts and the latest opener tech. All parts and labor are guaranteed.
For a precise quote and scheduling in Orlando, call (407) 788-1229. We can provide same‑day parts and service across Central Florida.
Pre-Work Setup: Power Down, Secure the Door, Prepare the Workspace
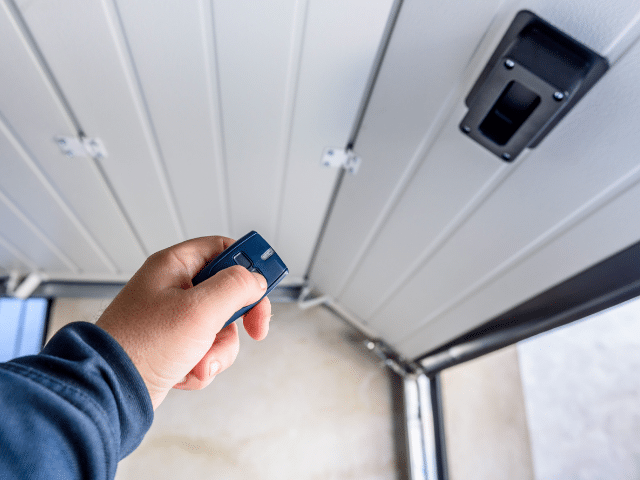
Start by cutting power and ensuring the opener cannot activate while you work. Unplug the power and pull the emergency release so the garage door opener will not engage.
Place a C‑clamp or locking pliers on the track just above the bottom roller. Verify the clamp holds by trying the panel gently by hand.
Stabilize the torsion tube with locking pliers against the header or wall. That keeps drums and cables from turning while you work the bar.
Keep bright lighting and a clear exit. Stage tools and replacement parts on a clean surface within reach. Lay out winding bars and fasteners in order.
- Check cables at the bottom bracket for fray or wear before proceeding.
- Maintain body position at the side of any winding bar and components at all times.
- Take photos of cable routing and cone orientation before disassembly.
- If anything looks bent, frayed, or off‑center, stop and call us for help.
We’re available 24/7 if you prefer we handle setup and safety. Call (407) 788-1229 for fast, licensed support and same‑day service in Orlando and Central Florida.
How to Fix a Garage Door Spring: Step-by-Step for Torsion Springs
Start by matching spring measurements with the door dimensions and staging your winding bars. Measure door width and height, then record spring length and diameter. Choose matched replacements before you begin. Use steel winding bars and stand at the side for every winding and unwinding action.
-
Loosen set screws and unwind safely
Insert a winding bar into the cone, keep the other bar ready, and loosen set screws only with a bar engaged. Unwind in controlled quarter turns, counting each time and keeping a firm grip on the bar.
-
Remove center bracket and cable drums
Remove the center bracket fasteners and loosen drum set screws. Slide drums off the tube so cables can be freed. Keep parts organized for reassembly.
-
Replace springs and re-thread cables
Slide off damaged springs and install matched replacements facing the correct direction. Refit drums, then re-thread cables onto the drum grooves. Ensure even cable tension to both sides.
-
Set cones, wind to spec, and tighten
Seat stationary cones at the center bracket and confirm alignment along the tube. Wind the springs in quarter turns to the specification for your door height. Tighten set screws to the flats and verify the cable wrap on each drum.
-
Final checks
Check alignment and travel at each stage. Proceed slowly and deliberate. If anything looks off, stop and call us.
If you’d like us to perform these steps with guaranteed results, call (407) 788-1229 or email EmeraldGarageDoorServices@gmail.com.
Dialing in Balance and Tension: Quarter Turns, Tests, and Fine Tuning
Small tension changes make big differences in smooth travel and long service life. Begin with the reference turn counts and get close before testing. That reduces repeat adjustments and protects the opener.

Typical turn counts by door height
Use reference counts as a starting point. For a 7 ft door, aim for about 30–32 quarter turns. For an 8 ft door, aim for about 34–36 quarter turns.
Half-open balance test and side-to-side leveling
Perform the half-open test by lifting the door to mid-travel and releasing. The door should hold its position without drifting up or down.
- Adjust in single quarter turns to correct a small lift or drop.
- Level side-to-side by matching cable wrap and equalizing turns on both springs.
- Repeat the half-open test after each small change rather than large changes at once.
- Note: If the door remains uneven, mismatched springs or cable issues may be present.
- Tip: Torsion adjustments deliver more consistent balance than extension setups for most doors.
- Safety: Keep hands clear of moving parts while testing door open and close positions.
We fine‑tune every door we service and guarantee the result. Call (407) 788-1229 for expert balancing and same‑day inspection across Central Florida.
Finishing Steps: Lubrication, Hardware Checks, and Reconnecting the Opener
A careful final pass keeps components moving smoothly and safely. We perform a full safety inspection and lubrication with every service visit and stand behind our work with a comprehensive guarantee.
Use lithium or silicone spray twice yearly on torsion springs, hinges, bearings, and metal rollers. Place cardboard behind the coils to catch overspray and keep spray off the track. Avoid WD‑40; it does not provide lasting lubrication.
Confirm set screws, bracket fasteners, and drum screws are tight before reconnecting power. Recheck cable seating on the drums and verify even wrap across both sides of the tube.
Final safety sweep and operational test
- Remove clamps and pliers, then reconnect the garage door opener and run one smooth open/close cycle.
- Listen for noises that signal dry parts or misalignment and address them immediately.
- Verify safety reversal and sensors work and that travel limits are correct.
If anything feels off during the final test, stop the opener and we’ll troubleshoot for you. Regular lubrication and checks extend spring life and reduce wear over many times of use.
Common Mistakes and How to Avoid Them
A few common mistakes turn a routine replacement into a costly injury or repeat repair.
Never use non‑steel tools for winding. Screwdrivers and improvised levers can slip and cause serious injury. Use proper bars and keep your hands clear.
Stand to the side of the cone, not in front. A sudden release sends parts outward. Clamp the track and stabilize the torsion tube before loosening set screws.
Miscounted quarter turns leaves the panel heavy or over‑powered. Count deliberately and test after small adjustments. Route each cable correctly on the drum so lift is even.

- Tighten set screws into the shaft flats to prevent slippage.
- Avoid over‑tightening drums; that can deform the tube and cause binding.
- Don’t use WD‑40 for lubrication; choose lithium or silicone products instead.
We correct DIY issues quickly and safely, and all our services are guaranteed. Call (407) 788-1229 for fast repair or replacement and reliable service across Central Florida.
Need Help Now? 24/7 Spring Repair in Central Florida
Emergencies don’t keep business hours, and neither do we. We offer round‑the‑clock repair and replacement service across Orlando and the surrounding counties. Our vans arrive stocked for faster turnaround and most jobs finish in one visit.
We’re family‑owned and local. Every technician is licensed, insured, and bonded. All team members pass background checks so you get trusted, professional service at your place.
Emerald Garage Door Services: licensed, insured, bonded
- 24/7 emergency repair with fully stocked vehicles for faster completion.
- We guarantee parts and labor on every repair and replacement we perform.
- We handle doors of all sizes and carry high‑cycle spring options and modern openers.
- Clear, upfront pricing and realistic timeframes so you can plan with confidence.
- We prioritize safety checks, balance, and quiet operation before we leave.
Family‑owned, background‑checked techs, guaranteed parts and labor
We repair, install, and maintain garage door systems and openers using current technology. Our experience reduces repeat calls and protects your opener and vehicle.
Call (407) 788-1229 or email EmeraldGarageDoorServices@gmail.com
If you need immediate repair or a same‑day replacement estimate, call or email now. We respond quickly and stand behind our work with responsive support if you ever need us again.
Conclusion
A short final pass prevents most repeat trips and protects your opener. Confirm proper turn counts for your door height and perform a half-open balance test. Check cable routing on both drums and make sure wrap is even.
Use lithium or silicone spray for lubrication. Avoid WD-40. Inspect hardware and verify set screws, brackets, and drum seating before reconnecting power.
Be honest about your experience and the time this work requires. Extension setups or mismatched parts often need a different approach or professional help.
We’re here any time—day or night—with guaranteed service from a family-owned team serving Orlando and Central Florida. Call (407) 788-1229 or email EmeraldGarageDoorServices@gmail.com for repair or replacement and fast answers.
FAQ
What safety steps should we take before starting spring work?
Kill power to the opener, release the emergency latch, clamp the track and secure the door with locking pliers or C‑clamps on the bottom panel. Wear eye protection and gloves. Keep bystanders clear and make sure you have solid footing and good lighting.
How do we know whether the system uses torsion or extension springs?
Torsion springs ride above the door on a metal tube and use winding cones. Extension springs sit alongside the tracks and stretch on lift. TorqueMaster systems hide springs inside a torsion tube. Visual inspection from the interior tells us which system we have.
When is DIY acceptable and when should we call Emerald Garage Door Services?
We recommend DIY only for experienced homeowners with the right tools and a single low‑tension task. Stop and call us if springs are under high tension, if the door is heavy or uneven, or if you lack winding bars, replacement parts, or confidence. We handle complex and high‑risk repairs safely.
What tools and parts do we need for torsion spring replacement?
Essential items include two certified winding bars, adjustable wrenches, locking pliers, socket set, PPE, and a replacement double‑life torsion spring matched by length and wire diameter. Use 7×19 lift cables and quality drums or cones for reliable operation.
How long does a professional torsion spring replacement typically take?
Most single‑spring replacements take about 45–90 minutes on site, including safety checks, balance testing, and a final opener reconnection. Time varies with door size, corrosion, and whether cables or hardware also need replacement.
How do we match a new torsion spring to the old one?
Measure free length, wire diameter, inside diameter, and the spring’s wind direction. Compare door height and weight. We recommend using OEM or upgraded double‑life springs sized to the door for proper balance and longevity.
What is the correct way to unwind a torsion spring safely?
Always use two winding bars that fit the cone, keep a firm grip, and remove tension one full turn at a time. Never use screwdrivers or cheater bars. If springs are heavily wound or seized, call our technicians rather than risking injury.
How do we know the door balance is correct after replacement?
Perform a half‑open balance test: disconnect the opener, lift the door manually to waist height and let go. A balanced door stays in place or moves very slowly. Check side‑to‑side leveling and make quarter‑turn tension adjustments as needed.
What lubricant should we use and where?
Use a silicone or lithium garage door lubricant on bearings, rollers (if nylon), springs, and hinges. Avoid WD‑40 as a long‑term lubricant. Apply sparingly and wipe excess to prevent dirt buildup.
What are common mistakes that cause failures after repair?
Common errors include mismatched spring size, improper winding count, loose set screws, reused frayed cables, and skipping balance checks. These cause rapid wear, opener strain, and safety hazards. We inspect all hardware during service.
Are torsion spring repairs covered by warranty from Emerald Garage Door Services?
Yes. We provide parts and labor guarantees on spring replacements performed by our technicians. Coverage terms vary by job; we explain warranty details before starting work and document parts used.
Do we need to replace both springs if only one is broken?
We often recommend replacing paired springs together. Springs installed at the same time share wear; replacing both restores balanced life expectancy and reduces return visits.
What should we do if the opener runs but the door won’t open after spring replacement?
Check that cables are properly seated on drums and that set screws on the torsion tube are tight. Verify the opener is reconnected and travel limits are correct. If issues persist, call our team for a prompt diagnostic and fix.
How quickly can Emerald Garage Door Services respond in Central Florida?
We offer fast response across Orlando and surrounding areas. For emergency spring breaks we provide priority scheduling and 24/7 options. Call (407) 788-1229 or email EmeraldGarageDoorServices@gmail.com for immediate assistance.