Curious how garage door torsion spring repair and how a single broken coil can stop your whole entry system and risk costly damage? We explain what happens, why proper measuring and winding matter, and when to call trained technicians.
We are a family-owned team serving Central Florida with licensed, insured, and bonded technicians. We offer 24/7/365 emergency support and precise installation, maintenance, and replacement services.
Our approach is clear and safe. We cover the cone, shaft, drum, cable, bearings, set screws, and correct winding counts. Never use improvised tools; use proper winding bars and follow the 20-coil wire size method.
All parts, labor, and service are guaranteed. Every team member is background-checked. Call (407) 788-1229 or email EmeraldGarageDoorServices@gmail.com to schedule service in Orlando and nearby areas.
Key Takeaways
- Broken springs can damage the opener and other parts; do not operate the system.
- Correct measurement and winding are essential for safe balance and function.
- We provide step-by-step service and 24/7 emergency support in Central Florida.
- Use proper tools and procedures for cones, shafts, drums, and cables.
- All work is licensed, insured, bonded, and guaranteed for your peace of mind.
Why This How-To Matters Today in Central Florida
High humidity and constant cycles mean small parts fail fast if they are not chosen and installed correctly. Over 30,000 related injuries happen each year in the U.S., many tied to high-tension components and unsafe handling.
Do not open or close a system with a broken spring. Top panels can bend and openers can be damaged. Accurate selection and correct winding are critical for balance and safe operation.
We serve Orlando and nearby communities with rapid, guaranteed service 24/7/365. Our family values guide honest inspections, clear estimates, and background-checked technicians ready to step in when risk is high.
- Salt air and humidity speed corrosion; regular lube extends part life.
- Measure and mark components before disassembly to ensure correct alignment.
- Misidentified wire size, wrong wind, or seized set screws turn fixes into major jobs.
- We help you weigh DIY versus calling our licensed, insured team for same-day support.
About Emerald Garage Door Services: Licensed, Insured, and 24/7/365 Support
James Balfe founded our family business to bring honest, skilled service to every Central Florida home. We combine family values with professional licensing, insurance, and bonding. Every technician is background-checked and carries the right tools and quality parts for the job.
Family-owned values and background-checked technicians
We arrive on time. We explain the issue clearly. We make sure you understand options and pricing.
Call or email anytime: (407) 788-1229 – EmeraldGarageDoorServices@gmail.com
We offer 24/7/365 support across Orlando and nearby areas. Services include installation, maintenance, and upgrades for openers and entry systems. Services, parts, and labor are guaranteed.
- Background-checked staff with approved tools and stocked parts.
- Same-day fixes when possible and clear estimates before work begins.
- Preventive plans to keep systems balanced, quiet, and safe year-round.
Safety First Before Any Garage Door Torsion Work
Before touching high-energy components, pause and prepare a safe workspace. High-tension systems store dangerous energy. Treat them like heavy machinery and plan every move.

High-tension hazards: why winding bars are mandatory
Use only 1/2″ x 18″ or longer winding bars that fit the cone. Never use screwdrivers or improvised tools. Keep one bar fully seated in the cone at all times when transferring load.
Personal protective gear and stable ladder positioning
Wear safety glasses, sturdy gloves, and proper footwear. Position ladders off to the side of the cone path so you stand clear of any sudden movement.
Power down and disconnect your garage door opener
Unplug the door opener and disengage the trolley before any work. Clamp the tracks to stop unexpected travel and keep bystanders well away.
When to stop and call a professional immediately
- Spinning cones, distorted shaft, or seized set screws.
- Excessive play in old cones or damaged drums and cables.
- Any doubt about fit, torque, or control — call us 24/7/365.
We prioritize your safety and guarantee our work. If anything looks unsafe, stop and contact Emerald Garage Door Services for reliable, immediate support.
Understanding Torsion vs. Extension Springs
We explain the two common counterbalance systems so you can make safer choices for your home. Knowing which system you have helps you avoid risky DIY fixes and decide when to call us for guaranteed service.
How torsion systems counterbalance heavy doors
Torsion units mount above the opening and wind as the door closes. They store rotational energy on the shaft to offset the door’s weight and reduce strain on the opener.
That smooth action gives more consistent balance and longer life for rollers and bearings.
Common break causes and prevention
Typical failures come from metal fatigue after thousands of cycles, corrosion in humid climates, and neglected lubrication. Regular silicone-based lube cuts friction and slows rust.
- Extension springs run along the tracks and require safety cables to contain a snapped coil.
- Daily use speeds cycle count; main-entry households wear parts faster.
- Visible gaps in coils, heavy lifting, or uneven travel mean stop and schedule service.
We can upgrade to higher-cycle units, size parts precisely, and inspect alignment. Call us anytime to make sure components remain safe and balanced across Central Florida.
Tools and Parts Checklist for Torsion Spring Replacement
Having the right tools and parts ready makes every job faster and safer. We stage gear before we start so each step is controlled and clear.
Essential tools we use
Right tools matter. Bring two 1/2″ x 18″ winding bars, vise grips (locking pliers), adjustable or two 9/16″ wrenches, sockets, a sturdy ladder, and strong lighting.
Common parts to have on hand
- Correctly sized springs and matched torsion springs.
- Cable drums, lift cable, end bearing plates, and center bearing/bushing.
- Silicone-based lubricant to protect coils and bearing surfaces without trapping dirt.
We label hardware as it comes off. That simple step speeds reassembly and avoids mix-ups.
We arrive equipped with professional-grade tools and quality parts, and we guarantee our workmanship, parts, and labor. If any tool or part is in doubt, pause and call our 24/7/365 team so you make sure the job finishes safely.
How to Measure Garage Door Torsion Springs Accurately
Accurate measurements are the foundation of a safe, balanced system and cut repeat visits. We walk you through each dimension so the correct part arrives the first time. Measure only when tension is fully released and keep hands and tools clear of coils and cones.

Key dimensions to record
- Inner diameter: use calipers or read factory markings from the spring tube.
- Wire size: measure 20 coils and divide length to determine the wire gauge.
- Overall length: measure the full unwound spring and add any broken pieces together.
Wind direction and placement
Place the right-wind unit on the left side of the anchor bracket and the left-wind on the right side. The wire ends should point inward toward the center of the shaft. Misplacing a wound spring or miscounting coils causes imbalance and extra wear on other parts.
- Take clear photos before disassembly to match original alignment.
- Note drum model and cable size for compatibility.
We’re happy to confirm measurements by phone or during a no-pressure visit. Call us and we’ll arrive with correctly sized parts to finish the job in one trip.
Pre-Work Setup: Secure the Door and Mark Reference Points
Start every job by securing the opening and creating clear reference marks before you loosen any hardware. This simple step reduces mistakes and keeps the work predictable.
Power down and lock the system. Unplug the garage door opener, disengage the trolley, and clamp the tracks just above the lowest rollers. This prevents unexpected movement while you work.
With cables still under tension, wrap them on the drums and mark each drum and the shaft for alignment. Mark both left and right sides so you can level the assembly later.
- Verify cables sit in drum grooves and have even tension before loosening hardware.
- Place vise grips on the shaft to stop rotation while you set or release drum tension.
- Label left/right components and note the side each drum came from to avoid mix-ups.
- Inspect end bearing plates, center bearing, and anchor bracket for damage or loose screws.
Take clear photos of your marks and setup. We apply these same controls on every call. If you prefer, call us 24/7/365 and we will take the next step with our guarantee.
Safely Unwinding and Removing Old Torsion Springs
Begin by seating a full-length winding bar into the cone and testing for play before you touch any hardware. Never loosen a set screw without a bar engaged. Keep one bar seated at all times while you transfer load between bars in quarter-turns.
Proper bar insertion depth and set screw precautions
Use two 1/2″ x 18″ winding bars that fit the cone fully. Insert the bar to the core of the cone and gently test for lateral play before you loosen screws.
Loosen set screws with a small adjustable or open-end wrench. Avoid box or socket wrenches; a slipping cone can make these dangerous.
Controlling torque as you unwind quarter-turns
Hand off load between bars in controlled quarter-turn steps. Pay attention to torque changes and keep a firm grip and stable stance on the ladder.
Keep hands clear of the winding path and never work directly in front of the cone. If bars don’t seat or feel loose, stop and call our team — we offer 24/7/365 support and guarantee the work.
Loosening hardware, sliding springs, and handling distorted shafts
Confirm zero tension before you remove stationary cone bolts at the center bracket. Slide springs toward the ends while watching for burrs, paint, or rust that can snag on the shaft.
- Tap the bar near the cone to move past swollen or distorted shaft areas.
- File set-screw burs so cones and new springs slide smoothly during reassembly.
- Watch the drum and cable ends for nicks; keep the path clear as you remove parts.
Safety is our priority. If cones have excessive play, bars don’t fit, or anything binds, pause and let us take over. We serve Orlando and nearby areas with licensed, insured technicians available any time.
Installing New Springs, Cones, and Re-centering the Shaft
A properly centered shaft and evenly routed cables make the winding step predictable and safe.
We slide new springs onto the shaft in the same order and orientation as removed. Place the right-wind unit on the left side of the anchor bracket and the left-wind unit on the right side. Correct placement prevents imbalance and extra wear.
Stationary cone mounting and center bearing
Bolt the stationary cones to the center bracket. Use a single center bearing or bushing to avoid binding. Recenter the shaft in both end bearings so the drums sit square.
Resetting drums, cable routing, and tension
Route each cable behind the drum toward the jamb and seat it in the groove. Wrap cable evenly and set the cable stop. Use a vise grip on the tube to prevent rotation while you align marks and snug set screws.
- Slide new parts in original order and confirm wind on each side.
- Align drums to previous marks and match set screw indentations.
- Inspect end bearing plates and fasteners before winding.
- Verify cables are taut, not crossed, and fully seated end to end.
We install correctly sized, high-quality parts backed by our service, parts, and labor guarantee. When everything is aligned and snug, you are ready for the winding step.
Winding New Torsion Springs and Tightening Set Screws
Precise winding is the last step that makes the whole system work smoothly and safely. We calculate quarter-turn counts by door height so the springs store the correct torque for balanced travel.
Every 3″ of door height equals one quarter turn. A 7′ door needs about 28 quarter turns, 7’6″ about 30, and 8′ about 32. Insert the first bar, rotate upward by quarter-turns, then transfer the load to the second bar and repeat.
Quarter-turn counts and safe bar handoffs
Always keep one bar fully seated in the cone while handing off. Maintain a firm stance and keep hands clear of the winding path.
- Feel increasing torque as you near the target count and pause if anything slips.
- Position the bar slightly above horizontal at the final turn before you lock the cone.
- If counts feel off, stop, reset, and correct before proceeding.
Final set-screw torque and vice grip release
Tighten set screws to lock the cone to the shaft without over-stripping. Confirm there is no slip as you remove the bar.
Release the vise grip carefully and verify the shaft does not rotate unexpectedly. Recheck counts on both sides so the door lifts evenly during testing.
We make sure the winding and set-screw steps are exact and guaranteed. Inspect cables after winding to confirm they remain seated end to end in the drums. Precision here prevents future service issues and keeps the system working reliably.
Balance, Test, and Lube: The Final Calibration
We finish each job with simple tests that confirm smooth travel and balanced operation. This final pass prevents surprises and keeps the system reliable.
Halfway balance test and smooth travel checks
Disconnect the opener and lift the panel by hand. The door should hold at mid-travel with minimal drift.
If it rises or falls more than a few inches, we adjust winding in quarter-turns until balance is right. We then run the full travel and listen for unusual noises that signal worn bearings, misaligned drums, or cable issues.
Silicone-based lubrication for coils, bearings, and rollers
Apply a light silicone-based lubricant to coils, end and center bearings, and rollers. Avoid heavy greases that attract grit and cause binding.
Recheck that cables stay seated in the drum grooves and that tracks are free of obstructions. Confirm seals meet jambs at top and bottom and that movement is smooth from closed to fully open.
- We complete every job with a thorough safety and performance check and provide a guarantee on our work.
- We identify parts nearing end-of-life and offer clear options to prevent downtime.
- Final visual inspection covers set screws, cones, and shaft alignment before we leave.
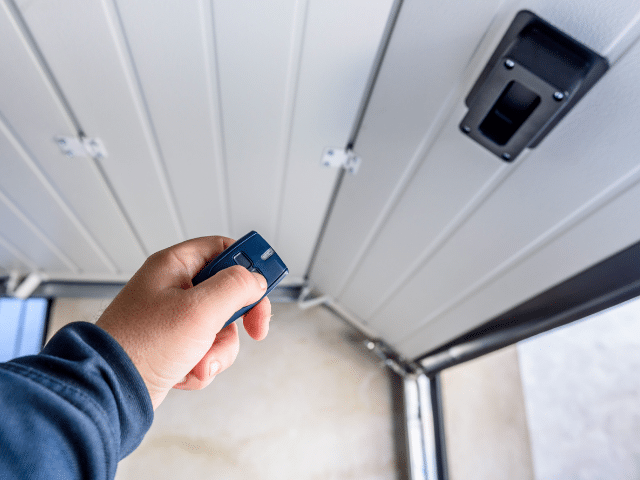
Reconnect the Garage Door Opener and Verify Safety Systems
With mechanical work complete, we re-engage the trolley and reconnect the garage door opener as a controlled, final step. We follow the opener manual and the manufacturer’s sequence to couple the trolley safely.

Trolley re-engagement and force/limit adjustments
We guide you through coupling the trolley so it decouples and couples smoothly. Then we set open and close limits to prevent over-travel that can strain panels or leave the panel partly open.
We adjust force settings so the unit reverses promptly on obstruction. Proper force prevents excess wear on parts and protects occupants.
Photo-eye alignment and auto-reverse testing
We align photo-eyes at the same height and test beam interruption to ensure the system stops when the beam is blocked. Next, we perform a contact-reverse test by applying gentle resistance at the bottom of travel to confirm sensitivity.
- Confirm remotes, keypad, and smart features pair and function.
- Verify manual release operates for power outages.
- Listen for new noises under powered operation; fine-tune as needed.
We service and install garage door openers with the latest technology and verify all safety systems before we leave. Our work is guaranteed in Orlando and nearby areas.
garage door torsion spring repair: Costs, Timing, and When to Call Us
Fast, accurate estimates save time and reduce the risk of repeated visits. Typical professional work for two units often runs between $200–$300 in some markets, while full jobs with premium parts and labor commonly start near $400. Costs change with door size, cycle rating, and the condition of cables, drums, and bearings.
Typical cost ranges and DIY trade-offs
DIY can cut labor costs but adds time, safety risk, and the expense of proper tools. Incorrect parts or procedures can damage the opener or panels and lead to higher bills later.
- Factors that affect price: panel height, spring cycle rating, and worn parts.
- DIY timeline: sourcing parts, measuring, setup, and calibration often takes much longer than a pro visit.
- Professional benefit: correctly sized parts, exact winding, and alignment—often completed in one trip.
Rapid, guaranteed service from Emerald Garage Door Services
We provide transparent pricing, 24/7/365 response, and a strong guarantee on services, parts, and labor. If you encounter seized hardware, distorted shafts, or uncertain measurements, calling us saves time and risk.
- We carry premium springs and matching parts so we can replace garage door components right the first time.
- Call for a firm estimate and scheduling that fits day or night.
- Emergency response minimizes downtime for vehicles or commercial bays.
Call (407) 788-1229 or email EmeraldGarageDoorServices@gmail.com anytime for fast help and a clear, no-surprise quote.
Common Mistakes to Avoid with Torsion Springs
Clear marks, correct wind orientation, and even cable tension prevent most balance problems. We focus on simple checks that stop small errors from becoming expensive or unsafe.
Never use improvised winding tools
Do not use screwdrivers, plier handles, or similar tools to wind or unwind springs. They slip under load and cause serious injury. Use the right tools and follow quarter-turn procedures.
Left/right wind placement matters
Place the right-wind on the left side and the left-wind on the right side. A swapped, wound spring or incorrectly mounted unit creates imbalance and stresses the shaft and drums.
Watch cable tension, set screws, and alignment marks
Mark drums and the shaft before loosening hardware so alignment is preserved. Make sure cable tension is equal on both drum grooves. Tighten set screws to lock cones without stripping.
- Do not run the opener with a broken or partially wound spring — panels and the operator can be damaged.
- Inspect for shaft burrs and worn bearings; friction can mimic imbalance.
- When in doubt about counts, tools, or alignment, call us to finish the job safely and quickly.
Conclusion
Conclusion
Wrap up every job with a clear checklist so performance stays steady and safe. We summarized a stepwise approach from prep and measurement to winding and final calibration. This reduces risk and keeps panels balanced.
We emphasize safety around high-tension parts and why the right tools and exact parts matter. Correct sizing, placement, and winding counts deliver smooth, balanced operation and fewer callbacks.
We are ready 24/7/365. Emerald Garage Door Services provides licensed, insured, background-checked technicians and a satisfaction guarantee on services, parts, and labor. Call (407) 788-1229 or email EmeraldGarageDoorServices@gmail.com for fast, professional help with new springs, testing, and final checks.
FAQ
How do I know if a spring is broken or just needs adjustment?
If your opener runs but the panel won’t move, or the door is heavy to lift by hand, a spring is likely broken. Listen for a loud snap near the header. If the door opens unevenly or binds, you may need a tension adjustment rather than a full replacement. For safety and accuracy, we recommend scheduling an inspection with Emerald Garage Door Services in Orlando.
Can we replace springs ourselves to save money?
Replacing high-tension springs is dangerous without the right tools and training. Winding bars, proper cones, and vise grips are mandatory. Mistakes can cause serious injury or damage. We advise homeowners to call our licensed technicians for fast, insured service and reliable results.
How long do new springs usually last?
Lifespan depends on cycle rating and environment. Typical residential springs last between 7,000 and 20,000 cycles. Coastal humidity, lack of lubrication, or corrosive conditions can shorten life. We use higher-cycle springs and apply silicone-based lubricant to extend service life.
What tools and parts should we have on hand before starting work?
Essential items include two certified winding bars, adjustable wrenches, sockets, vise grips, a sturdy ladder, and safety glasses. Replacement parts often include cones, cable drums, bearings, high-quality springs, and new lift cables. We carry all approved parts and the right tools for a safe job.
How do you determine left-hand and right-hand springs?
Springs are wound opposite each other. The left side (when facing the door) typically uses a right-hand wound spring and the right side uses a left-hand wound spring. Proper placement is critical for balanced operation. Our team measures and verifies winding direction during service.
What is the correct way to measure a spring for replacement?
Measure inner diameter, overall length, and wire size using the 20-coil method for accuracy. Count active coils and note any markings. We perform precise measurements on-site to match spring specifications and ensure safe balance and operation.
How many turns should new springs be wound?
Turn counts depend on door height and spring dimensions. Typical values range with door height and spring rate. We follow manufacturer guidelines and perform a balance test after winding. Incorrect winding causes poor balance or premature wear, so we handle this calibration.
What are common mistakes that lead to failures after replacement?
Using screwdrivers instead of winding bars, mixing up spring hand, under- or over-tightening set screws, and ignoring cable alignment cause issues. Dirty or dry components wear faster. Our technicians follow strict procedures to avoid these mistakes.
Do you lubricate springs and other parts during service?
Yes. We apply silicone-based lubricant to coils, bearings, rollers, and cables to reduce friction and prevent corrosion. Proper lubrication improves performance and extends the life of moving parts.
How long does a professional spring replacement usually take?
Most residential jobs take about 60 to 90 minutes, depending on complications like rusty hardware or bent shafts. We arrive prepared with parts and tools to complete the job efficiently and safely.
Will replacing springs fix opener-related issues?
Replacing springs restores balance and reduces strain on the opener. However, if the opener has worn gears, broken sensors, or incorrect force settings, those issues need separate attention. We test and adjust the opener after spring work to ensure full functionality.
Are there safety checks you perform after installation?
Yes. We perform a balance test at halfway, check smooth travel, verify cable seating on drums, tighten set screws to spec, and test safety reversing systems including photo-eye alignment. We only leave when the system operates safely and reliably.
How much should a spring replacement cost in Orlando?
Costs vary by spring cycle rating, door size, and parts required. Typical residential replacements are competitively priced. We offer transparent quotes and explain DIY trade-offs. Call Emerald Garage Door Services at (407) 788-1229 for an accurate estimate.
What should I do if a spring snaps while the door is open?
Do not attempt to close, wind, or adjust the system. Secure the area and disconnect the opener to prevent unexpected movement. Contact Emerald Garage Door Services immediately. Our technicians handle high-tension situations safely and arrive with the right tools and replacement parts.
Do you offer emergency service and warranties?
Yes. We provide 24/7/365 emergency response and stand behind our work with workmanship guarantees and manufacturer-backed part warranties. We prioritize safety and fast, dependable service throughout Orlando and surrounding areas.