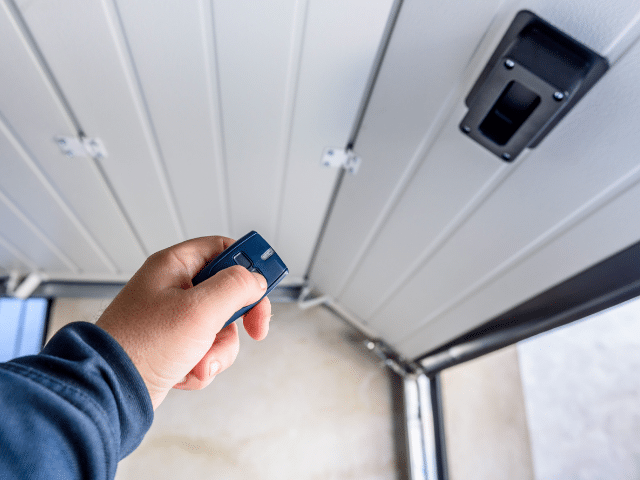
Can a single, clear guide remove the stress from a heavy, risky home project and keep your property safe? Here is a guide on how to install a garage door track.
We are Emerald Garage Door Services. We are family-owned, licensed, insured, and bonded. Our team serves Orlando and Central Florida with background-checked technicians and guaranteed parts and labor.
We set expectations up front: this short guide explains safe, step-by-step preparation, alignment, and fitting for a typical residential overhead garage door. We outline when you can proceed and when you should call our pros for help.
Doors can weigh hundreds of pounds and often need one or two helpers. Follow the manufacturer’s instructions and use new hardware with your new door to prevent alignment and safety problems.
Key Takeaways
- Expect the project to take most of a day and plan for helpers.
- Use new parts with the new door; do not reuse old hardware.
- Follow manufacturer instructions and stop if springs or cables are involved.
- Proper alignment reduces noise and extends system life.
- We offer 24/7/365 support and guaranteed service in Orlando.
Before You Begin: Safety, Scope, and When to DIY vs. Call a Pro
Before you lift panels or touch hardware, stop and review safety, scope, and limits for this job. We prioritize your safety and give honest guidance about what you can handle and what we should handle for you.
High-tension warning: torsion spring assemblies store dangerous energy. Do not attempt spring removal or tensioning unless you have training and the right tools. A slipped spring can cause severe injury or property damage.
Manual vs. automatic systems
Manual units are lighter and often simpler. They usually mean fewer parts and easier panel placement.
Automatic systems add door openers, wiring, and sensors. That increases complexity and electrical risk. If power components or safety sensors are present, consult the manufacturer’s instructions and consider calling a pro.
- Wear eye protection and gloves. Lock out power before touching any operator or wiring.
- Stage helpers on both sides of the opening and avoid pinch points while lifting panels.
- Follow torque specs, fastener types, and sequence in the written instructions to prevent misalignment.
Our recommendation: Install panels and set the track only if you are confident in handling weight, ladders, and alignment. Leave spring tensioning and final balancing to our licensed, insured, and bonded team. We offer 24/7/365 support for emergencies and complex work.
Planning and Measurements for a Proper Track Installation
A careful layout and accurate measurements set the foundation for a smooth installation. Measure the rough opening width and height first; the rough opening usually equals the door size. Record both numbers and confirm panel sizing before you lift any section.

Clearance and center line
Minimum clearance targets: aim for about 3-3/4″ sideroom each side, roughly 10″ headroom for extension springs or 12″ for torsion, and backroom equal to door height plus 18″. Allow extra space if an opener will be mounted.
Workspace and parts staging
Clear the garage and move vehicles and storage away. Lay parts on sawhorses or clean wood blocks. Verify you have sections, hinges, rollers, brackets, fasteners, and weather seals.
- Mark the center line above the opening for the center bracket and to keep sections square.
- Confirm panel orientation; bottom sections have the weather retainer and specific bracket holes.
- Pre-drill hinges and bracket holes on wood jambs to prevent splitting and keep fasteners straight.
- You’ll need two stepladders, accurate levels, and a tape measure to keep everything plumb.
Do not mix old parts with new. Matched parts reduce vibration, prevent premature wear, and ensure smooth travel. We’re available 24/7 and guarantee parts and labor when we assist.
Tools, Hardware, and Parts You’ll Need
Gathering the right tools and hardware up front saves time and prevents costly mistakes. We outfit each truck with professional-grade tools and stand behind our work with guaranteed parts and labor.
Core tools
You’ll need basic hand and power tools for safe, precise work. Wear gloves and safety goggles while you handle panels and fasteners.
- Drill with bits, ratchet and socket set, level, and tape measure.
- Locking pliers or C-clamps for holding components steady.
- Stepladders and padded sawhorses to protect finishes.
Hardware and fasteners
Organize brackets, hinges, rollers, and fasteners by side and sequence. Use matched kits and avoid mixing similar screws.
- Brackets for bottom corners and track attachment. Stage bottom brackets first.
- Hinges for panel links and rollers for smooth travel.
- Lag screws and screws sized for framing; choose length for solid bite without splitting.
Ceiling supports and service items
Use perforated angle iron for rear hangers and secure them into joists. Keep a dedicated garage door lubricant on hand for hinges, rollers, and spring components later in the installation.
Need help sourcing parts or verifying specs? Call us at (407) 788-1229. We guarantee parts and labor when we supply and install.
How to Install a Garage Door Track
Begin at the bottom panel. Identify the bottom section by its weather retainer. Place that panel on padded supports with the weather seal facing out. Align bottom corner brackets over the pre-punched holes and secure with lag screws into solid framing.

Set the first section level in the opening. Shim under corners as needed so the section sits perfectly before you fasten anything. Install the top corner hinges and insert rollers into the hinges and bottom brackets.
- Slide the first vertical track onto the rollers, leaving a small clearance to avoid rubbing.
- Fasten the track to the jamb with proper screws or lags and check plumb with a level.
- Stack the next panel carefully, connect hinges between sections, and insert the upper rollers.
- Mount the opposing vertical track and confirm both sides are parallel and at the same center marks.
Verify consistent gaps along the panels and mark the top hinge position so the top roller will seat in the curved radius later. We’re here 24/7 if a panel won’t sit level, a track won’t plumb, or you have questions about hardware. Our installations are guaranteed, and we treat your home with care.
Connecting Curved and Horizontal Tracks, Hangers, and Stops
Secure the radius pieces, then level the long runs so the system moves true and quiet.
Attach the curved section where the vertical meets the radius. Tighten fasteners so seams sit flush. This helps the roller transition smoothly and prevents binding.
Lift each horizontal run with two ladders and a helper. Align both sides at the same elevation and set them level. Use lag fasteners into joists for rear hangers made from perforated angle iron.
- Join vertical and curved sections with snug screws so rollers roll without catching.
- Secure rear hangers to ceiling framing; avoid anchoring into drywall only.
- Square the system by confirming horizontal rails are parallel and perpendicular to the opening.
- Install stop bolts at each horizontal end so rollers cannot exit the run.
- Mount top hinges partway down the upper section so the top roller seats in the curve.
If you’re unsure about hanger locations or squaring the horizontal runs, we’ll guide you. We ensure the system is true and quiet. Emerald Garage Door Services backs every installation with a guarantee and local support in Orlando.
Spring Systems, Garage Door Openers, and Final Adjustments
Spring assemblies and openers are the final, safety-critical parts of any proper door setup.

Torsion versus extension: torsion springs mount above the opening and store high energy. Extension springs run along the sides with cables and pulleys. Each spring system balances panel weight differently and needs precise tensioning.
Winding a torsion spring is risky. Stored energy can cause sudden, violent movement. We strongly recommend leaving spring tensioning and final balancing to our licensed, insured team. We’re available 24/7/365 and guarantee parts and labor. Call (407) 788-1229 or email EmeraldGarageDoorServices@gmail.com for safe, professional setup.
Lubrication and balance checks
Use a dedicated lubricant on springs, hinges, and rollers. Do not use general-purpose sprays. Lubrication reduces friction and noise and extends component life.
Check balance before adding power. Lift the panel to mid-travel; it should hold near center without drifting. Verify even cable wrap on drums and equal spring turns before any test.
Opener considerations and final settings
Confirm a nearby power source and mount a reinforced center bracket at the header. Align safety sensors and test automatic reversal per the manual.
- Assemble the rail and attach the opener arm to the top section with the bracket.
- Set travel limits so the top stopper prevents overrun and the bottom stop closes gently.
- Test force settings and final fasteners, then run the system through multiple cycles.
Final check: confirm cables are secure, springs are stable, and the system runs smooth and quiet across the curved radius. If anything feels off, call our team for professional adjustment and guaranteed results.
Professional Help in Central Florida and 24/7 Support
Emergencies don’t wait — a rapid, reliable response protects your property and peace of mind.
We are family-owned and founded by James Balfe. We are licensed, insured, and bonded. Every technician passes a background check.
We service garage doors and openers across Orlando and Central Florida. We arrive ready to work with stocked parts and tools. Most repairs finish in one visit.
- Rapid-response emergency service 24/7/365 for broken springs, damaged track, doors off-line, inoperative openers, and sensor faults.
- Licensed, insured, bonded technicians who work at your home or business with background-checked staff.
- Installation, repair, and maintenance of overhead garage door systems and quiet belt or high-cycle openers.
- Truck-stocked parts and a parts and labor guarantee so the job is done the right way the first time.
We diagnose root causes, not just symptoms. That keeps your door running smoothly and cuts repeat visits. We offer proactive maintenance plans and same-day options.
Call us anytime at (407) 788-1229 or email EmeraldGarageDoorServices@gmail.com. We’re available 24/7/365 and ready to help.
Conclusion
A clear final check prevents binding and keeps your system safe and reliable.
Level the first section, set vertical rails with correct clearance, join the curved and horizontal runs, hang and square each side, then add stops and align the top. Fasten brackets and hinges, tighten screws, and handle panels with steady care for quiet operation.
Keep a smooth roller track and well placed stops to avoid overtravel and lost rollers. Spring tension is hazardous; if anything feels uncertain, call our team. We’ll finish safely.
We’re here 24/7/365, for new door work, opener upgrades, or alignment fixes. Call (407) 788-1229 or email EmeraldGarageDoorServices@gmail.com. Our family-owned team guarantees parts and labor.
FAQ
What safety precautions should we take before beginning a track and door panel project?
Before starting, we disconnect power to the opener, clear the workspace, wear eye and hand protection, and never loosen or adjust torsion springs without proper tools and training. High-tension springs can cause severe injury. If springs or cables look damaged, call Emerald Garage Door Services for safe handling.
When is it appropriate for homeowners in Orlando to tackle track and door work themselves?
Homeowners can handle basic tasks like replacing rollers, tightening brackets, and tracking alignment if the door is light and springs are intact. We recommend hiring pros for spring replacement, opener wiring, heavy panel swaps, or any job involving significant tension or structural changes.
How do we measure the opening and confirm panel sizing before ordering parts?
Measure the clear opening width and height, headroom above the opening, and side room at both jambs. Verify each panel’s height and thickness. These dimensions determine track curvature, opener placement, and whether weatherstripping and brackets fit correctly.
What minimum sideroom, headroom, and backroom do we need for standard overhead systems?
Typical requirements are 3-3⁄4″ sideroom for tracks, 10″ headroom for standard torsion systems, and 8–12 ft of backroom for full vertical travel and most openers. We assess exact needs on-site, since high-lift or low-headroom kits change these figures.
Which core tools and hardware should we gather before starting?
We recommend a drill, level, locking pliers, ratchet set, adjustable wrench, stepladder, and clamps. Stock hinges, rollers, lag screws, angle brackets, stop bolts, and ceiling support hangers. Quality parts and proper fasteners prevent premature failure.
How should we set the bottom panel and prepare it for stacking panels above?
Install weatherstrip on the bottom rail, attach brackets and bottom hinges, and insert the rollers. Square the panel in the opening and secure it to jambs temporarily. This foundation ensures subsequent panels align and that seals prevent drafts and pests.
What’s the correct way to attach vertical roller tracks to the first side?
Position the vertical track with 1⁄8″ clearance from the roller and jamb, plumb it with a level, and fasten using lag screws into solid framing. Do not overtighten; allow slight movement for thermal expansion. Repeat for the opposing track after panels are stacked.
How do we join curved (radius) tracks to horizontal runs and install ceiling hangers?
Align the top panel roller path, bolt the radius to the top of the vertical track, and attach horizontal track sections toward the rear. Mount rear hangers to ceiling joists or use perforated angle for distributed support. Square the system side-to-side and front-to-back before tightening all fasteners.
Where do we place stop bolts and how do we align top panel rollers on the curve?
Install stop bolts at the end of the vertical track to prevent rollers from escaping. Adjust stops so the top panel seats squarely against the header. Rollers should travel smoothly through the curve; if bind occurs, loosen fasteners, correct alignment, then retighten.
What are the differences between torsion and extension spring systems, and why is tensioning dangerous?
Torsion springs sit on a shaft above the door and use torque; extension springs run along the horizontal tracks. Both store kinetic energy. Tensioning requires special tools and precise adjustment; improper handling can cause severe injury or door damage. We advise professional tensioning for safety.
When should we lubricate parts, and which points need attention before installing an opener?
Lubricate rollers, hinges, bearings, and spring coils with a silicone or lithium-based spray. Check balance by lifting the door manually; it should stay partially open at mid-height. Proper lubrication and balance reduce strain on the opener and extend component life.
What opener specifications and mounting details should we consider for reliable operation?
Match opener power to door weight and type—chain, belt, or screw drives have different noise and maintenance profiles. Center-mount the header bracket to the door’s top section and secure the rail to ceiling supports. Install safety sensors near the floor and set travel limits and force within manufacturer guidelines.
Can Emerald Garage Door Services handle emergency repairs and new installations in Orlando?
Yes. We provide licensed, insured, and bonded emergency repair, routine maintenance, and full installations across Orlando and nearby communities. Our technicians respond quickly and follow local code and safety standards.
How do we contact Emerald Garage Door Services for service, quotes, or 24/7 support?
Call (407) 788-1229 or email EmeraldGarageDoorServices@gmail.com. We offer on-site estimates, preventive maintenance plans, and emergency assistance throughout Central Florida.