Have you ever wondered how a small change in balance can save you time, money, and a dangerous accident?
We explain how to approach spring adjustments with care and clear steps you can trust. Our goal is to help you understand what balance does and why correct settings protect the opener and other hardware.
We outline the two common systems you may see and list the proper tools for safe work. Follow simple safety checks at each step. Use solid steel implements and avoid improvising with the wrong bits.
Emergency help is available 24/7 from Emerald Garage Door Services. We are family-owned, licensed, insured, and bonded in Central Florida. Every technician is background-checked and all parts and labor are guaranteed. Call (407) 788-1229 or email EmeraldGarageDoorServices@gmail.com for professional service.
Key Takeaways
- Correct balance reduces wear on the opener and extends service life.
- Use the right tools and solid steel winding bars to prevent slips.
- Identify your system before attempting any adjustments.
- Lubricate metal parts twice a year with lithium or silicone spray.
- Call our licensed team if you see damaged parts or feel unsure.
Understanding garage door spring tension and why it matters
Small tension changes have big effects on how smoothly a door moves and how long components last.
The springs counterbalance the panel weight so the motor and cables do not do all the work. Proper spring tension keeps opening and closing smooth. A balanced system lets you lift the door with little effort and hold it at mid-travel.
Incorrect settings cause clear symptoms. The door may get stuck halfway, slam shut, or drift upward when released. Over-tensioned springs can pull the panel up on their own. Under-tension makes lifting hard and can allow the panel to fall.
- Correct balance reduces motor strain, cable wear, and noise.
- Uneven tension can twist panels, misalign tracks, and make rollers pop.
- Sudden stuttering, bouncing, or jerky opening and closing are warning signs—stop and inspect.
Document any symptoms before making adjustments. If the panel feels unusually heavy, do not force it. We can assess and correct balance quickly with guaranteed parts and labor. Call us at (407) 788-1229 or email EmeraldGarageDoorServices@gmail.com for fast, professional help.
Safety first: critical precautions before you adjust anything
Before you touch any hardware, stop and set up safeguards that keep people and property safe.

Torsion and extension assemblies hold extreme energy and can cause serious harm if mishandled. We emphasize caution and clear controls before any work begins.
Unplug and lock out the opener so the system cannot activate while you are nearby. Secure the panel with C-clamps or locking pliers just above the bottom rollers to prevent unexpected movement.
- Use only solid steel winding bars for torsion systems; never substitute a screwdriver or wrench.
- Stand to the side of the bars and keep your head and torso out of the path of potential failures.
- Wear eye protection and gloves that grip steel without snagging fabric or hair.
Organize lighting and tools within arm’s reach and keep a clear exit route. Make small, measured adjustments and stop if you hear grinding or see cable fray. When in doubt, call our licensed, insured, and bonded team for 24/7 help. We are available at (407) 788-1229 or EmeraldGarageDoorServices@gmail.com. Every technician passes a background check and all parts and labor are guaranteed.
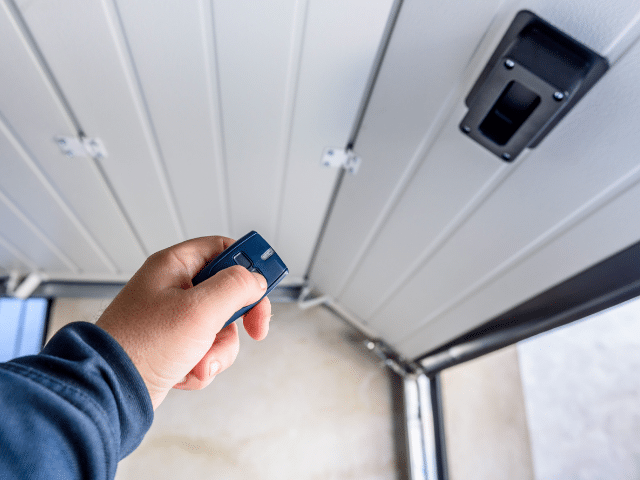
Identify your spring type: torsion springs versus extension springs
Start by visually identifying the system you have so adjustments go smoothly and safely. A clear photo or a short inspection helps us advise quickly or schedule same-day service in Central Florida.
How to spot a torsion setup. Look above the header for a solid shaft with winding cones, a center bracket, and cables that wrap on drums. Most homes use a single or double torsion configuration for quieter operation and longer life.
How to spot an extension setup. Find long, narrow springs running parallel to the horizontal tracks. Safety cables often run through them and hooks attach to track hangers.
- TorqueMaster note: Wayne Dalton systems hide the spring inside a tube and use a counter wheel to track turns. Adjustments may require a 7/16” socket or a 1/4” hex at half speed.
- Document color codes on winding cones or end fittings to avoid mixing parts across sides.
- If safety cables are missing or parts look mismatched, stop and call us for repair; we carry the right tools and parts.
Knowing your system determines the correct tools, adjustment method, and necessary safety steps. If you’re unsure, send photos to EmeraldGarageDoorServices@gmail.com or call (407) 788-1229 for fast guidance.
Tools and materials for safe spring adjustments
Gathering the right kit is the first step to a safe, predictable adjustment.
We recommend professional-grade tools to protect you and your equipment. Use two solid steel winding bars sized to fit the cone hole (often 1/2″). Measure the cone hole before you begin so the bar fits snugly and won’t slip under load.

Secure the panel with C-clamps or locking pliers and keep a wrench for set screws. For drill-assisted systems, have a 7/16” socket or a 1/4” hex/Allen bit ready. Run a torque-rated drill at half speed to avoid overshooting turns.
- Essential torsion kit: two matched bars, a wrench, and eye protection.
- Safety and access: C-clamps, a sturdy ladder, bright work light, and grip gloves.
- Marking and lubrication: paint or tape to mark turns and lithium or silicone spray after adjustments.
Position lights to remove shadows where you engage set screws. Keep all tools within reach before loosening anything so you never leave a spring partially controlled.
If you lack the right tools or prefer a pro touch, call us for a safety-focused visit. We guarantee parts and labor and offer 24/7 service across Central Florida at (407) 788-1229.
Step-by-step: torsion spring adjustment with winding bars
Follow a clear, step-by-step method to adjust torsion systems safely and accurately.
Unplug the opener and clamp the track above a bottom roller with a C-clamp or locking pliers. This immobilizes the panel and removes unexpected movement during work.
Secure the panel, locate the cone and set screws
Locate the winding cone with four holes and the two set screws that lock the coil to the shaft. Verify shaft flats so screws bite cleanly.
Insert the winding bar, loosen set screws, and make quarter-turn adjustments
Fully seat a solid steel winding bar into a cone hole before you loosen set screws. Keep your body to the side and loosen set screws only after the bar is secure.
Make changes in quarter turns. Small increments let you dial in balance without overshooting the correct setting.
Direction matters: wind up to increase, down to decrease
Wind up to add lift if the panel slams or feels heavy. Wind down to reduce lift if the panel rises on its own or won’t close fully. Count turns and keep notes.
Slightly stretch the coil and retighten set screws
Tap the bar outward about 1/4″ to stretch the coil slightly and prevent binding. Then retighten the screws into the shaft flats and inspect for wobble or slip.
- Make equal adjustments on both sides when two springs share the load.
- Check cables on the drums to confirm they sit tight and true.
- Pause between changes, assess behavior, and stay clear of moving coils.
When in doubt, we can perform this high-risk procedure for you. Call (407) 788-1229 or email EmeraldGarageDoorServices@gmail.com. We are licensed, insured, bonded, and background-checked, available anytime across Central Florida.
Alternative torsion systems: drill-assisted winders and turn counting
A controlled drill method can make winding precise—if you follow strict steps.
Secure the shaft with locking pliers so the cable and panel stay still. Then use a drill fitted with a 7/16” socket or a 1/4” hex/Allen bit. Run the drill at half speed to prevent overshooting your target turns.

Safe drill setup
Keep clothing and hands away from rotating parts. Pause after partial turns to check cable wrap on drums. Verify set screws at the cone before and after winding.
Counting and verification
Mark the coil with a painted line so each full wrap equals one counted turn. For TorqueMaster systems, read the counter wheel numbers to match manufacturer turns. If the panel begins to rise on its own, back off by measured increments.
- We immobilize the shaft with locking pliers before any powered winding.
- Use half-speed drilling and pause to inspect cable seating and hardware.
- Combine paint-line counts with a halfway balance test for accuracy.
Prefer a pro for drill-assisted winding? We’re available 24/7/365 with guaranteed results. Call (407) 788-1229 or email EmeraldGarageDoorServices@gmail.com.
Extension springs: how to adjust by moving the hook
Extension systems let you fine-tune lift by moving a simple hook on the track hanger.
Start by opening the system until the panel is fully up. This releases most of the extension spring load so the coils are slack.
Unplug and disconnect the opener. Then secure the panel with C-clamps or locking pliers above the bottom rollers to prevent movement.
After the coils are slack, remove the hook from the hanger slot. To increase lift, move the hook to a higher hole. To reduce lift, place the hook lower.
Make one-hole moves and test the opening and closing after each change. Adjust both sides equally unless you are correcting a single-side gap.
- One-hole increments let you see measurable change without overshooting the balance point.
- Check safety cables and replace any frayed hardware before returning the panel to service.
- Keep hands clear of pinch points between coils and brackets when reattaching the hook.
Recheck clamps before testing to avoid unexpected movement. If the system lacks safety cables or shows wear, we recommend professional service.
We’re ready 24/7 at (407) 788-1229 or EmeraldGarageDoorServices@gmail.com. Licensed, insured, bonded, with guaranteed parts and labor.
How to test and balance the door after spring adjustments
After adjustments, a simple mid-travel check tells us if balance is correct.
Halfway-open test: does the panel stay put?
Remove the vice grips or clamps. Then raise the panel to door halfway and release it gently.
If the panel stays put, you have the right tension and balance. If it closes on its own, add lift in small steps.
Fine-tuning in quarter-turns or one-hole increments
On torsion systems, add or remove quarter-turns and count each change with a paint line or counter wheel. For extension setups, move the hook one hole at a time.
- Repeat the halfway test after each small change so the panel converges quickly.
- Listen for scraping, popping, or cables shifting on drums as clues alignment needs work.
- Check photo-eyes and force limits once mechanical balance is set to confirm safe operation.
- Document final turns and hook positions for future maintenance and time-saving reference.
We stand behind precise balancing. If the panel won’t hold at halfway or feels heavy, call us at (407) 788-1229 for a guaranteed solution, any time.
Maintenance after adjustment: lubrication and inspection
After you tune balance, a quick inspection and lubrication will protect your investment.
We recommend a biannual service routine to keep the system running smoothly. Apply lithium or silicone spray to all metal moving parts twice a year. This includes coils, hinges, bearings, and metal rollers.
Proper lubricants and simple checks
Use lithium or silicone sprays only. These reduce friction and noise and help parts move freely.
Do not use WD-40 for long-term lubrication. It can wash away grease and shorten component life.
Signs you need replacement or further service
- Visible coil gaps, persistent imbalance, or the panel feels heavy despite correct adjustment.
- Excessive noise, uneven travel, flat or wobbly rollers, and frayed cables.
- Drum slippage or sudden changes after seasonal temperature shifts that affect tension.
- Quick force test: a well-balanced system lifts smoothly without straining the opener.
We offer maintenance plans across Central Florida to extend system life. Keep a maintenance log with dates and products used. For 24/7 scheduling or tune-ups call (407) 788-1229 or email EmeraldGarageDoorServices@gmail.com. We are family-owned and guarantee parts and labor.
When to call a pro: safety limits and 24/7 help in Central Florida
If you notice frayed cables, cracked drums, bent shafts, or broken coils, stop and call a licensed technician right away. These conditions are high risk and need expert attention to prevent injury or property damage.
Situations that require licensed, insured technicians
We recommend professional service when the system is off track, sections are buckled, or set points won’t hold. DIY fixes that leave uneven lift, over-wound coils, or stripped fasteners create ongoing hazards.
- Immediate call: frayed cables, broken coils, cracked drums, or bent shafts.
- When a panel won’t track or sections are warped and won’t seal properly.
- After failed DIY attempts that left stripped screws or mismatched parts.
- For opener reprogramming, force and travel calibration, and full-system tune-ups.
- Emergency failures, stuck panels, or any security-critical situation—fast response 24/7/365.
Contact Emerald Garage Door Services: (407) 788-1229 | EmeraldGarageDoorServices@gmail.com
We’re family-owned and founded by James Balfe. We are licensed, insured, and bonded. Every technician is background-checked and trained to our safety-first standards.
Family-owned, background-checked team, guaranteed parts and labor
We stock quality springs, cables, bearings, and rollers to finish most jobs in one visit. We also supply the correct tools, such as solid steel winding bars and proper sockets, and we advise calling us if you lack the right gear or training.
We guarantee parts and labor and keep clear maintenance records for your peace of mind. Call us any time—we respond quickly and work to get you back to safe operation with honest pricing and dependable service.
Conclusion
Finish every job with the halfway test and a quick inspection. Raise the garage door to mid-travel and let it sit. If it holds, balance and tension are correct.
Use lithium or silicone spray twice a year and avoid WD-40. For torsion work use winding bars or a drill with a 7/16” socket or 1/4” hex at half speed. For extension systems, adjust the hook with the door fully open and clamped.
We are Emerald Garage Door Services — family-owned, licensed, insured, and bonded. Our background-checked team is available 24/7/365 with guaranteed parts and labor.
Call (407) 788-1229 or email EmeraldGarageDoorServices@gmail.com for prompt, expert help and routine tune-ups that save time and protect your system.
FAQ
What does adjusting garage door spring tension involve?
Adjusting spring tension means changing the stored energy in the coil so the panel opens, closes, and balances correctly. We make small, measured turns or move the hook on extension systems to increase or decrease force. Proper balance prevents slamming, drifting, and stress on the opener.
How does incorrect spring tension affect operation?
Too much force can make the panel rise too quickly or lift the opener; too little lets it close too fast or drift open halfway. Both scenarios cause binding, noisy movement, and premature wear. We check balance and movement to confirm safe operation.
What safety precautions should I take before any adjustment?
Always disconnect the opener, clamp the panel in place, and wear eye and hand protection. Stand out of the spring’s arc, use approved winding bars or the correct socket on drill-assisted systems, and never use screwdrivers or improvised tools.
Are torsion and extension systems adjusted the same way?
No. Torsion systems require winding bars or a drill-assisted winder at the winding cone. Extension systems are adjusted by moving the hook or cable anchor. Each needs matched, incremental changes on both sides for balance.
How can I tell if I have torsion or extension springs?
Torsion springs sit above the header on a metal shaft and have a winding cone. Extension springs run along the track and stretch when the panel moves. Residential installs typically use one of these layouts.
What tools and materials do we use for safe adjustments?
We use solid steel winding bars, the correct-size sockets or hex bits for drill-assisted winders, C-clamps or locking pliers to secure the panel, and safety gear like gloves and eye protection. We also bring lighting, tape, and a paint line for turn counting.
How do you perform a torsion spring adjustment step-by-step?
We secure the panel, clamp it, locate the winding cone and set screws, insert the winding bar, loosen set screws, then make quarter-turn adjustments while holding the bar. We retighten set screws and test balance after each change.
Can I use a drill to wind torsion springs?
Drill-assisted winders are acceptable when used with the right socket or 1/4” hex bit at half speed and by trained technicians. We only use this method when it matches the system and safety protocols.
What is the paint-line or turn-counting method?
We mark a reference line on the spring or shaft and count turns as we wind or unwind. Using the counter wheel on some systems helps ensure precise, repeatable adjustments and avoids over- or under-winding.
How do you adjust extension springs safely?
We open the panel fully, secure it, relieve tension, then move the hook or change the anchor point up to increase force or down to reduce it. We make equal, incremental adjustments on both sides to keep the panel level.
How do you test balance after adjustments?
We perform the halfway-open test: with the opener disconnected, the panel should remain stationary halfway up. If it drifts, we fine-tune in quarter-turns or one-hole increments until it stays put.
What maintenance do you recommend after adjusting springs?
We lubricate springs, rollers, hinges, and bearings twice a year with lithium or silicone spray. We avoid heavy greases on springs and inspect for gaps, corrosion, or worn cables that indicate replacement is needed.
When should I call a professional for spring work?
Call us if springs are broken, there’s severe corrosion, you lack approved tools, or the panel is dangerously unbalanced. High-tension components and hybrid systems require licensed, insured technicians to avoid injury.
How can I contact Emerald Garage Door Services in Central Florida?
For 24/7 service, call (407) 788-1229 or email EmeraldGarageDoorServices@gmail.com. We are a family-owned, background-checked team providing guaranteed parts and labor across Orlando and surrounding areas.