Have you ever wondered how to program garage door opener to car? or why your vehicle won’t sync with the ceiling unit even when the lights flash like it should?
We are Emerald Garage Door Services, a family-owned team serving Central Florida with repair, installation, and maintenance for garage doors and the latest opener technology. We are licensed, insured, and bonded. Every technician is background-checked and ready 24/7/365.
We offer a simple, safe method to connect your vehicle transmitter with the ceiling motor. The basic steps are clear: put the in-vehicle transmitter in learn mode, pair it with any handheld remote if needed, then press the Learn button on the motor within the timing window.
We explain where that Learn control usually sits, what indicator lights mean, and when to clear prior pairings. We also share safety tips for ladder use and vehicle placement. If you prefer professional help, call (407) 788-1229 or email EmeraldGarageDoorServices@gmail.com.
Key Takeaways
- Place the vehicle transmitter in learn mode before starting the ceiling-unit step.
- Find the Learn button near the motor’s antenna or under the light cover.
- Watch the indicator light and allow the full timing window for pairing.
- Clear old pairings when conflicts occur for a clean connection.
- Follow basic safety: park level, keep hands clear, and use a stable ladder.
- We provide 24/7 support across Central Florida with guaranteed parts and labor.
What you’ll achieve and how this guide works
We’ll explain what success looks like and give a simple sequence that guides you from checks to a verified test. Our goal is to help homeowners and business owners in Central Florida finish this task quickly and safely, with 24/7 backup if you need us.
What you’ll gain: one-touch control from your onboard button. No extra remote to carry and reliable operation once pairing finishes.
We break the process into clear parts. First, confirm vehicle compatibility and ready the built-in transmitter. Next, choose a path: pair using a handheld remote or use the ceiling unit’s Learn control. Each phase gives signal feedback so you know the status.
- By the end, you press one in-vehicle control to open and close the garage door.
- We show readiness checks, pairing actions, and a final test so you always know the next step.
- We note timing differences across models and when to clear old codes or call for help.
Benefit: a safer, faster setup with expert support if anything behaves oddly during the process.
Prep first: compatibility, safety, and what you’ll need
Before you begin, confirm compatibility and set up your workspace for a safe, distraction-free pairing. Check your owner’s manual or vehicle menu to verify the built‑in transmitter works with the ceiling unit model you have. Gather the remote, a stable ladder, and a fresh battery.

Locate the Learn button and understand LED signals
The Learn control usually sits beside an antenna wire or under the lamp lens. You may need to open the cover to reach it. Watch the adjacent LED or led light for mode changes.
The indicator confirms each step. A steady light often means ready. A rapid flash usually shows a cleared code or a successful pairing window.
Clear previous memory on in‑vehicle system and motor
If the built‑in transmitter controlled another opener, you may need to clear its stored codes. Hold the two outer buttons until the indicator flashes rapidly. To clear the motor memory, press and hold the Learn control until the indicator cycles off and back on after several seconds.
Safety setup: park outside, accessory power, ladder basics
Park outside with the nose facing the door and use accessory power so the engine is off. Set a stable ladder under the motor and keep three points of contact while climbing. Check that the door moves smoothly by hand when disconnected; a binding panel is a safety issue we will correct before any programming step.
- Plan timing: you will have only a short window after pressing the Learn button to press the in‑vehicle button and finish the step.
- Have a fresh remote: keep a handheld transmitter nearby if you’ll pair through it first.
- Call us: if anything feels unsafe, call (407) 788-1229. We are available all day, every day.
Program your car using your remote control and HomeLink
We’ll keep this sequence simple and safe. Start by placing the in‑vehicle panel into learning mode, capture the handheld transmitter, then finish the handshake at the ceiling unit.
Put HomeLink in learning mode and pair with the handheld remote
Step 1: Press and hold the two outer in‑vehicle buttons until the indicator flashes rapidly. This prepares the panel to receive a signal.
- Hold the handheld transmitter 1–3 inches from the in‑vehicle controls.
- Press hold both the handheld and the chosen in‑vehicle button until the indicator changes pace or steadies.
- If the indicator never responds, replace the handheld battery and repeat the step.

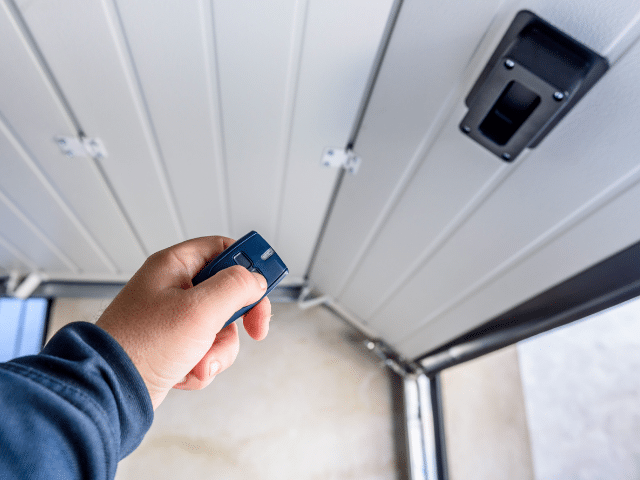
Finalize at the opener: press Learn, then the programmed car button
Walk to the ceiling unit and press the Learn button. You have a short timing window of seconds to return and press the programmed in‑vehicle button.
- Within those seconds, press the in‑vehicle button; some systems need a second press to finish the handshake.
- Watch for the motor light blink as confirmation.
- Test from the driveway so the opener responds on the first press and travel is correct.
If timing or indicator behavior trips you up, we can complete this quickly—call (407) 788-1229 or email EmeraldGarageDoorServices@gmail.com.
Program your car without a remote using the opener’s Learn button
If you don’t have a handheld transmitter, you can pair the vehicle’s built‑in button directly with the motor. This method uses the unit’s Learn control and works with most modern systems.

Find and press the Learn control
Locate the Learn button on the motor head. Colors vary: yellow, purple, orange, or green. Tap it once — quick and brief. Do not hold the control, or you risk erasing stored devices.
Finish the capture from inside the vehicle
Return to the vehicle within about 30 seconds. Press and then hold the chosen in‑vehicle button until the motor light blinks or you hear a click. That single blink confirms the system captured the rolling code.
- Stand at the motor: tap the Learn control once to enter pairing mode without wiping other devices.
- Hold button in the vehicle: keep it pressed during the timing window so the opener can record the signal.
- Watch the light: a blink or click shows success; then test the button from outside the garage.
- If the motor does not respond, repeat these steps and ensure the vehicle is close enough for a strong signal.
- If reaching the unit is unsafe, we can handle the steps and check travel, force, and sensors during one visit. We are available 24/7/365.
how program garage door opener to car: fixes, timing, and model nuances
Certain stalls in the pairing process come from model timing or a missing compatibility bridge. We diagnose troubles quickly and carry parts to resolve most issues on the spot.
When you may need a compatibility bridge or repeater
Some older vehicle systems use a signal format the motor won’t read. In those cases you may need a small bridge that translates the transmitter signal so the receiver accepts the rolling code.
Brand notes and timing differences across models
Certain openers accept a double-press during final capture. Others need a longer continuous hold. If pairing fails, clear motor memory by holding the Learn control until the indicator cycles, then repeat with fresh timing.
Common issues and quick troubleshooting
- Weak remote batteries and distance reduce range—replace cells and move closer.
- Electronic interference from routers or LED bulbs can block signals; try again with nearby devices off.
- Obstructions and misaligned safety sensors may mimic pairing errors—check sensors and light indicators first.
For older models, universal remote control units can emulate modern rolling codes. If you prefer not to experiment, call us. We arrive any time, day or night, and guarantee parts and labor.
Why Central Florida trusts Emerald Garage Door Services
A non‑responsive control is an inconvenience; we make restoring reliable access quick and simple. We are a family‑owned company founded by James Balfe. We serve Orlando and nearby communities with repair, installation, and maintenance for doors and modern opener systems.
We answer calls 24/7/365 and dispatch licensed, insured, and bonded technicians. Each tech passes a background check before their first service call. We carry parts and tools so most jobs finish on the same visit.
- Clear, written pricing and a guarantee on services, parts, and labor.
- Full system checks: balance, springs, cables, rollers, tracks, and safety sensors.
- Programming help and diagnostics for receiver and transmitter issues; we confirm forces and travel during service.
- We document what we did and show you how the in‑vehicle control works for ongoing convenience.
Call (407) 788-1229 or email EmeraldGarageDoorServices@gmail.com to schedule. We text on the way and aim for a friendly, expert visit every time.
Conclusion
Conclude with easy verification steps so every button works reliably from the driveway. Test each remote and in‑vehicle button several times. Watch the motor light after the learn button cycle, confirm range, and recheck safety sensors for smooth travel.
If anything fails, repeat the clearing step, allow those few seconds after tapping the learn button, and reduce nearby interference before trying again. For added convenience and security, label the paired button and reprogram access when ownership changes. We can finish the process and inspect the whole system any time. Call (407) 788-1229 or email EmeraldGarageDoorServices@gmail.com for 24/7 help and a guaranteed visit.
FAQ
Emerald Garage Door Services: how to program garage door opener to car
We guide Orlando homeowners through the setup of vehicle HomeLink or built-in remotes. Follow safe steps: verify compatibility, locate the Learn button on your opener motor, and use the car’s manual controls or handheld remote to teach the system. If you prefer, our certified techs can complete the sequence for you.
What you’ll achieve and how this guide works
You will link your vehicle control to your overhead system so one in‑car button operates the entry. The guide breaks tasks into prep, pairing with a remote, a Learn‑button method, and troubleshooting so you can finish the job with confidence and safety.
Prep first: compatibility, safety, and what you’ll need
Check that your vehicle supports HomeLink or a universal in‑car transmitter and that the opener model uses a Learn or Program button. Gather the handheld remote, ladder, and fresh batteries. Park outside the door, set the vehicle in accessory mode, and follow safety precautions while on a stable ladder.
Locate the Learn button and understand LED signals
The Learn button sits on the opener motor head or near the antenna. It may be yellow, purple, orange, green, or red. LED flashes indicate readiness or errors. Press once briefly to start a timed pairing window; consult your opener’s manual for exact blink patterns.
Clear previous memory on car HomeLink and opener if needed
If a vehicle button already controls another device, clear it by holding the chosen in‑car button until the LED changes (usually 20 seconds). On the opener, clearing rarely needed; instead, reprogram using the Learn button following the timed sequence.
Safety setup: park outside, power on accessory mode, ladder basics
Park with a clear line of sight to the door. Use accessory mode so electronics stay active but the engine is off. Use a solid ladder, have a helper if possible, and keep fingers clear of moving parts while testing the system.
Put HomeLink in learning mode and pair with the handheld remote
In the car, press and hold two HomeLink buttons until the indicator starts blinking to enter learn mode. While the indicator is flashing, press and hold the handheld remote button near the visor until the HomeLink indicator changes to a steady light. Then follow the opener’s Learn step to complete pairing.
Finalize at the opener: press Learn, then the programmed car button
After teaching HomeLink using the remote, press the motor’s Learn button once. You have about 30 seconds to return to the vehicle and press the chosen in‑car button for two seconds. Repeat if needed until the door activates reliably.
Program your car without a remote using the opener’s Learn button
Some systems allow direct car-to‑opener teaching. Press the opener’s Learn button, then within the timed window press and hold the in‑car button until the motor light or door responds. Colors of the Learn button vary by model; consult your owner manual for exact timing.
Find and press the Learn button (colors vary: yellow, purple, orange, green)
Look on the motor housing or control panel. The button may be a small square or circular plastic cap in the listed colors. Press it once briefly; the LED will flash to show the system is ready for a new transmitter.
Press and hold the chosen in‑car button within 30 seconds and test
After pressing Learn, return to your vehicle immediately and hold the programmed button for up to 30 seconds or until the door moves. Test operation several times to confirm stable connection and repeat the process if needed.
When you need a compatibility bridge/repeater for HomeLink
Some newer smart systems and rolling‑code openers require a wireless repeater or compatibility bridge. If pairing fails despite correct steps, a bridge can translate signals between HomeLink and Wi‑Fi or MyQ systems. We can assess and install the correct device.
Brand notes: LiftMaster/MyQ steps and Genie timing differences
LiftMaster and Chamberlain (MyQ) often use a Learn button and rolling codes; Genie models may require slightly different button timing. Always check the opener’s label for specific instructions. Our techs are familiar with model nuances and can complete model‑specific programming.
Common issues: interference, weak batteries, distance, obstructions
Failed attempts often stem from low remote batteries, signal interference, or being too far from the opener. Move closer, replace batteries, and avoid metal obstructions. If interference persists, we can diagnose radio issues and recommend fixes.
Older vehicles or systems: universal remotes and alternate methods
Older cars or legacy openers may not pair directly. A universal garage remote or a professional retrofit can bridge compatibility. We install and program universal devices that integrate smoothly with existing wiring and security settings.
Why Central Florida trusts Emerald Garage Door Services
We provide 24/7/365 emergency help with honest, family‑owned service. Our licensed, insured, and bonded technicians are background‑checked. We guarantee parts and labor and serve Orlando and surrounding areas with fast, reliable assistance.
24/7/365 emergency help, honest family-owned service
Our team responds anytime emergencies arise. We emphasize transparent pricing, careful workmanship, and respect for your property. Call or book service and we’ll arrive ready to solve the issue.
Licensed, insured, bonded; background-checked techs; guaranteed parts and labor
Emerald Garage Door Services maintains full licensing, insurance, and bonding. Every technician passes background checks. We back our work with warranties so you have lasting protection and peace of mind.
Call (407) 788-1229 or email EmeraldGarageDoorServices@gmail.com
Reach our dispatch team for programming help, scheduling, or emergency service in Orlando, FL. We’ll triage your situation and send a qualified technician if on‑site service is needed.