Ever wondered What are the Steps Involved in Installing a Garage Door or how to install a garage door? This guide will show you the way. We’ll look at DIY and professional installation options. We’ll also answer common questions to help with your project.
In Orlando, FL, and nearby, Emerald Garage Door Services is ready to help. The cost to install a garage door can range from $1,200 to $3,500. Knowing the steps can save you time and money. We’ll cover what you need to prepare, tools, and decisions for a successful installation, whether you do it yourself or hire a pro.
Key Takeaways
- The cost of installing a garage door varies widely, typically costing between $1,200 to $3,500.
- Installing an electric motor can add approximately $800 to your overall cost.
- Common DIY mistakes include ordering incorrect spring sizes and using inappropriate tools.
- Proper measurement and consideration of headroom and sideroom are essential for installation.
- Professional help is recommended if you face uncertainties or challenges during installation.
Introduction to Garage Door Installation
Knowing how to install a garage door is key to a good job. Many people wonder if they should do it themselves or get a pro. Choosing a pro ensures safety and follows local rules. Experts have the know-how to handle any problems that come up.
About 70% of homeowners choose professional installation. They see it as a complex task that’s best left to the experts.
Why Choose Professional Installation?
Professional installation has many benefits. It costs between $800 to $1,500, depending on the materials and complexity. Hiring pros avoids expensive mistakes.
Studies show that DIY jobs often fail in the first year. This is often because of wrong measurements or alignment issues. Garage doors are heavy, so it takes a team to install them safely.
Benefits of a Quality Garage Door
A good garage door brings many perks. It makes our homes safer and can cut energy costs by 20%. Plus, it looks better, with 60% of homeowners caring about looks.
Regular care can make a garage door last 50% longer. This saves money on new doors. Getting it installed right by experts also cuts down on future upkeep by 40%.

Selecting the Right Garage Door
Choosing the right garage door is key. It boosts our home’s look, function, and safety. We can pick from many types to fit our style and taste.
Types of Garage Doors
There are many garage door types, like traditional and carriage house. Each has its own purpose and can change how our home looks. Sectional doors are the most common, used in half of all homes. They keep the cold out and are easy to use. Roll-up doors save space and are gaining fans.
Materials to Consider
The material of our garage door matters a lot. It affects how long it lasts, how easy it is to care for, and how much energy it saves. Wood adds warmth but needs upkeep. Steel and aluminum are durable and easy to keep up. Insulated doors can cut energy costs by 15% to 20%, saving money over time.
Customization Options
We can make our garage doors our own with customization. We can pick colors, finishes, and hardware to match our taste. Custom doors are available for a unique look, but they cost more. Adding windows and designs makes our garage doors stand out, improving our home’s look.
Preparing for Installation
Getting ready for garage door installation is key. We need to measure our garage door opening right to get the perfect fit. This means measuring the width and height, and considering sideroom, headroom, and backroom. Accurate measurements help avoid problems during installation.
Measuring Your Garage Opening
Standard single garage doors are 7 ft. high and 8 or 9 ft. wide. Double doors are 7 ft. high and 16 ft. wide. We need at least 3-3/4″ sideroom for the vertical track. For the EZ-SET® Extension Spring System, we need 5-1/2″ sideroom and 10″ to 12″ headroom.
Gathering Necessary Tools
We should collect all tools needed for the job before starting. We’ll need safety goggles, a measuring tape, a level, and a drill. Also, we might need 10 bolts and 6 lag screws for assembly. Having all tools ready makes the installation smoother.
Checking Local Regulations
It’s important to know local rules for garage door installations. Some places need permits or inspections. Checking these rules early can prevent future problems and ensure we follow all guidelines.
Removing the Old Garage Door
Removing an old garage door is a key step before installing a new one. It’s important to focus on safety to avoid accidents. Old systems can have high-tension parts that need extra care.
Safety Precautions
Our safety is top priority when removing an old garage door. We should wear gloves and safety goggles to protect ourselves. It’s also vital to disconnect electrical parts to avoid shock.
Garage door springs are dangerous and can cause serious injury if they fail. Knowing the risks helps us remove the door safely.
Tools for Removal
Using the right tools makes removing the old garage door easier. Wrenches and screwdrivers help detach tracks and openers. A pry bar can safely remove the door from its hinges.
After removing the door, we should dispose of it properly. This makes our workspace clean and ready for the new door.

Installing the Garage Door Frame
When we start installing the garage door frame, precision is key. We take accurate measurements first. Then, we focus on setting up the garage door tracks and mounting the header bracket.
Setting Up the Tracks
We begin by securing the vertical tracks to the garage walls. It’s important to make sure they are level and plumb. The frame depth must be at least 4 inches.
After that, we attach the horizontal tracks to the header bracket. This bracket should be at least 12 inches above the head jamb. Following the manufacturer’s guidelines helps avoid misalignment, ensuring smooth operation.
Mounting the Header Bracket
Next, we mount the header bracket, making sure it aligns with the horizontal tracks. The head frame should be 9 inches wider than the head jamb for support. Proper alignment is essential.
The door’s rough opening should be the door width plus 3 inches and the height plus 1.5 inches. This ensures the finished frame fits perfectly. By following these steps, we ensure a successful installation and long-lasting performance.
Hanging the Garage Door Panels
After setting up the frame, we move on to hanging the garage door panels. This step requires careful attention to align each panel perfectly. This ensures the door operates smoothly. We use rollers to keep the panels in place.
Aligning the Panels
Aligning panels is key to a uniform look. Most homes have either 4-panel or 5-panel doors. We must check that each panel fits right, without going over size limits.
The space between panels should not be more than 21 inches. Adding 2 to 3 inches to the bottom panel’s insulation makes it fit better. Trimming the insulation to match the door’s bottom ensures everything aligns well.
Securing the Panels
Securing the panels is our main task. Each panel must fit snugly in the tracks for balance. Using 3M double-sided tape helps keep them in place.
But, we must be careful not to open the door too much. This helps keep everything aligned and the tape to stick well.
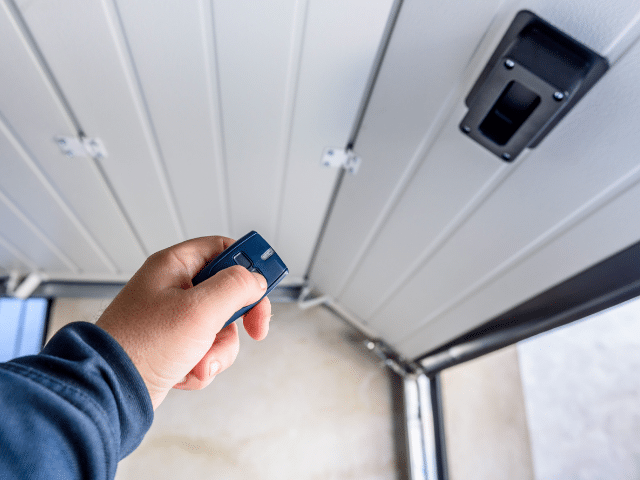
Installing the Garage Door Opener
Installing a garage door opener makes our homes more convenient and secure. First, we need to pick the right opener for our needs. We should think about the garage door’s weight, the drive type, and features like Wi-Fi.
A chain drive opener is good for heavy wooden doors. Belt drive openers are quieter, great for attached garages. Screw drive openers are cheaper but need more upkeep.
Choosing the Right Opener
After deciding what we need, we can choose the right opener. Chain drive openers are affordable but loud, best for detached garages. Belt drive openers are pricier but quieter, ideal for multi-panel doors.
Direct drive openers are easy to maintain but less common. Each type has its pros and cons, showing why picking the right opener is key.
Wiring the Opener
After picking our opener, we start the installation. This includes wiring it up right. It’s vital to follow the manufacturer’s guide for safety and function.
We must connect it to power and install safety sensors. Sensors should be no more than six inches from the ground for best performance. Checking the opener’s parts, like remote batteries, keeps it working well for years.
Connecting the Garage Door Springs
Connecting garage door springs is key to making sure our garage doors work right and safely. There are mainly two types: torsion springs and extension springs. Knowing about these types helps us plan how to install them well. Each type is different, affecting how we attach them to the door and tracks.
Understanding Spring Types
Torsion springs sit above the door and make it move smoothly. This makes them a favorite among homeowners. Extension springs, found on the sides of the door, are cheaper but don’t last as long. Choosing between them is important for our garage door springs installation.
Spring Installation Process
Installing springs correctly is key to safety. We must follow specific steps to attach them properly. A well-installed spring can extend your garage door’s life by up to 30%.
But, if not installed correctly, it can be dangerous. Almost 25% of DIY efforts lead to injuries that need doctor visits.
So, it’s often best to hire professionals. They can replace springs in 1 to 2 hours and offer guarantees for their work.
Final Adjustments and Tests
After installing the garage door, we need to make final adjustments. We start by testing the door’s balance. This is key for safety and efficiency.
Testing Door Balance
We lift the door to a half-open position first. If it stays there without moving, it’s balanced. If not, we need to make adjustments to avoid damage and ensure it lasts longer.
Adjusting Limit Settings
Then, we adjust the limit settings on the opener. This step is important for how far the door opens and closes. By fine-tuning these settings, we prevent the door from slamming shut or leaving gaps.
After adjusting, we test the garage door’s operation thoroughly. We check for any unusual noises or problems. Making sure everything works right makes our garage door system safer and more efficient.
Maintaining Your Garage Door
Keeping your garage door in good shape is key to its long life and smooth operation. Regular maintenance helps avoid sudden breakdowns. It involves checking for wear, oiling moving parts, and ensuring hardware is in top condition.
Regular Maintenance Tips
Do simple maintenance tasks every six months. Just 10 minutes a time can add years to your garage door’s life. Clean photo eye sensors, replace weatherstripping, and power wash the door to keep it looking and working great.
Don’t forget to oil the hardware. This makes your garage door quieter and more reliable. It can even cut down failure risks by up to 70%.
When to Call Professionals
Know when to call for help. If your garage door makes strange noises or is hard to open, it’s time to get experts. Also, if you see a lot of wear or find problems with rollers, springs, or cables, it’s best to call a pro.
Getting a licensed contractor can lower failure risks by 25%. This gives you peace of mind and keeps your garage door working right.

Conclusion
This guide helps you understand how to install a garage door. Whether you choose to do it yourself or hire professionals, we’re here to help. Proper installation can greatly improve your home’s value, making it look and work better.
Contact Emerald Garage Door Services
Emerald Garage Door Services focuses on quality and safety. Our team is known for careful planning and execution. If you need garage door services, call us at (407) 788-1229. We’re ready to offer you top-notch solutions.
Our Commitment to Quality
We’re committed to providing the best garage door installation services. Choosing us means you get a job done right the first time. Our detailed approach avoids common problems, ensuring your garage door works well and safely for years.
FAQ
What are the steps involved in installing a garage door?
First, measure your garage opening. Then, remove the old door. Next, install the frame and tracks.
After that, hang the garage door panels. Install the garage door opener. Connect the springs. Lastly, do final adjustments and maintenance.
Can I install a garage door myself?
Yes, you can install a garage door yourself. Make sure to follow a detailed guide. Also, have the right tools and materials ready.
But, be careful. Improper installation can be dangerous.
What tools do I need for garage door installation?
You’ll need safety goggles, a measuring tape, and a level. Also, a drill, wrenches, screwdrivers, and possibly a ladder.
Having all tools ready will make the installation easier.
How do I know what size garage door to buy?
Measure the width and height of your garage opening. Remember to include sideroom, headroom, and backroom. This ensures the door fits perfectly.
What types of garage doors are available?
Garage doors come in many styles. You can choose from traditional, carriage house, and contemporary designs. Pick one that looks good with your home.
What materials should I consider for a garage door?
Garage doors are made from wood, steel, aluminum, fiberglass, and vinyl. Each material has its own durability and upkeep needs. Choose what suits your lifestyle and environment best.
What is involved in the final adjustments after installation?
After installation, test the door’s balance. Adjust the opener’s limit settings for smooth opening and closing. Also, check for any unusual noises or issues to ensure everything works right.
How often should I maintain my garage door?
Regular maintenance is key. Check the door every few months for wear. Lubricate moving parts and inspect weather seals to keep it working well.
When should I consider professional garage door services?
If your door has ongoing problems, significant wear, or you’re not comfortable with repairs or installations, get professional help.